


以下是旧文章
NotionNext支持多种评论插件,其中体验比较好的我个人觉得是Twikoo,您可以参考以下教程进行配置安装:


您也可以选择Valine/Waline,关于Valine/Waline的部署可以访问此篇文章:


比较简单的部署方案
上面的Twikoo和Valine都需要用到第三方的数据存储,部署的步骤要复杂些。幸运的是,NotionNext还支持以下几种较为简便的评论插件。
- Cusdis
一个非常轻量实用的免费开源评论插件,数据存储在cusdis服务器
- Utterance 、 Giscus 、Gitalk
这三种都是github的扩展应用,其评论数据存放在Github的仓库中。此类插件用户需要先登录github账号进行评论,不支持匿名评论。
其中部署最便捷的当属 Cusdis 和 Utterance这两个插件。您可以任选一个部署,当然,您也可以选择同时部署多个。
开始教程
1. Cusdis
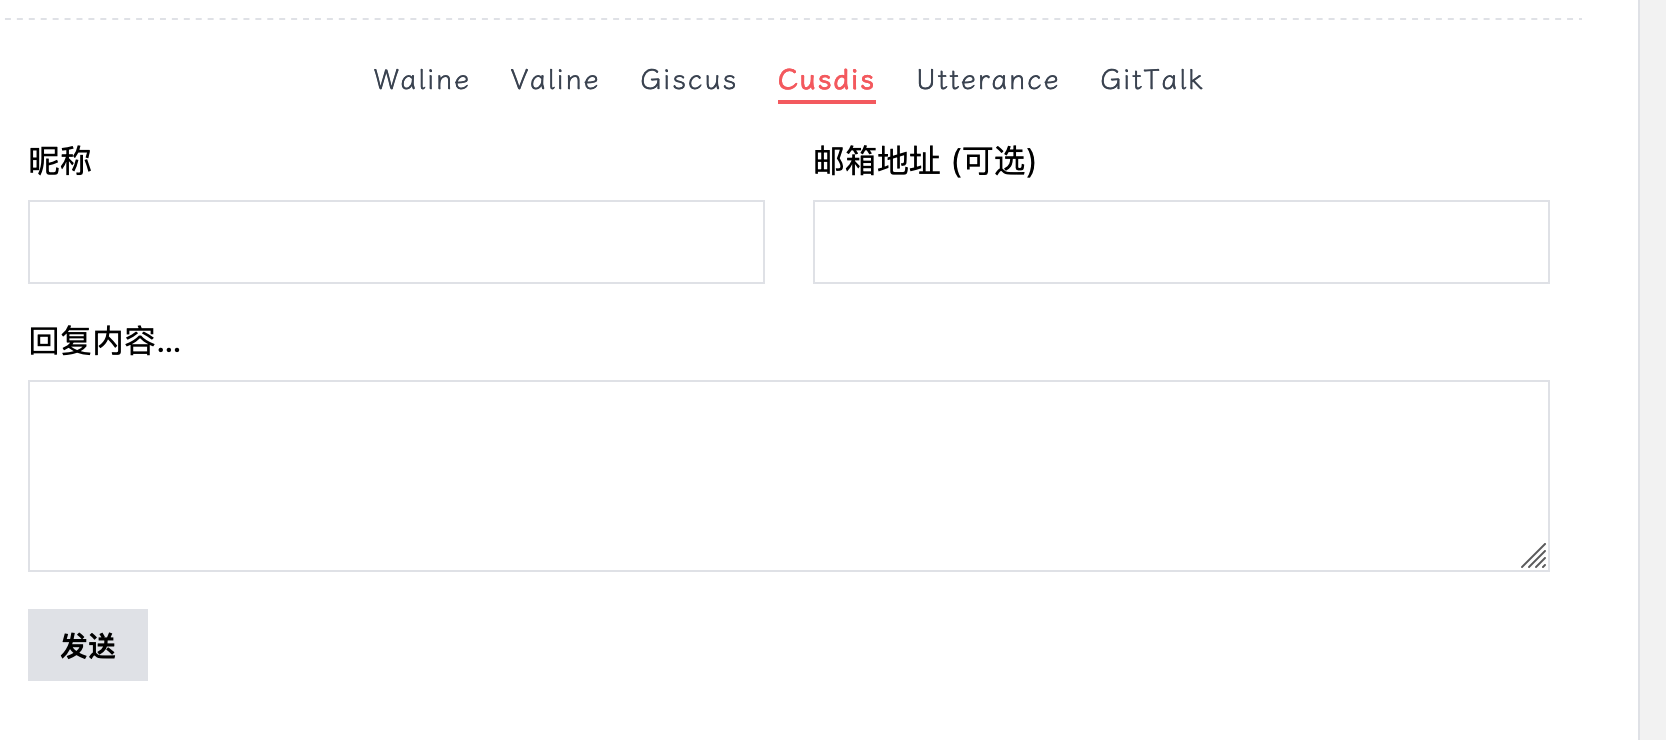
完成效果预览
您的博文底部会有这样的评论页面。
开始:
注册Cusdis
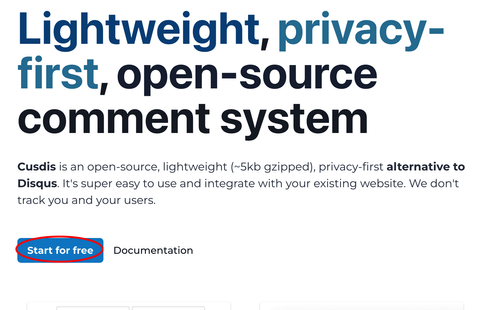
访问Cusdis的官网进行登录注册

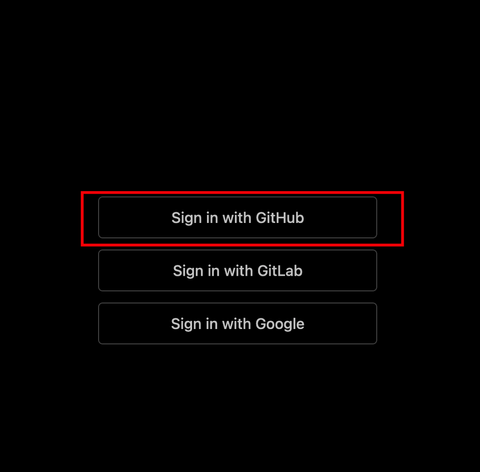
点击Start for free ,并用Github登录即可 Sign in With Github (点击查看截图)
[可选] 配置邮件通知地址,以便收到新评论时邮件通知您,(点击展开截图)
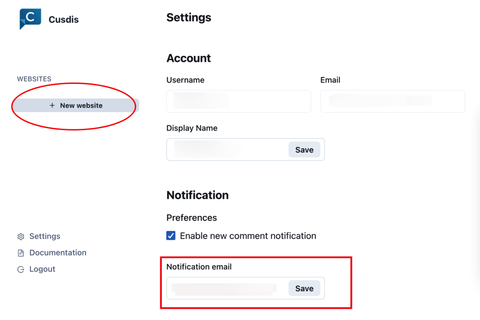
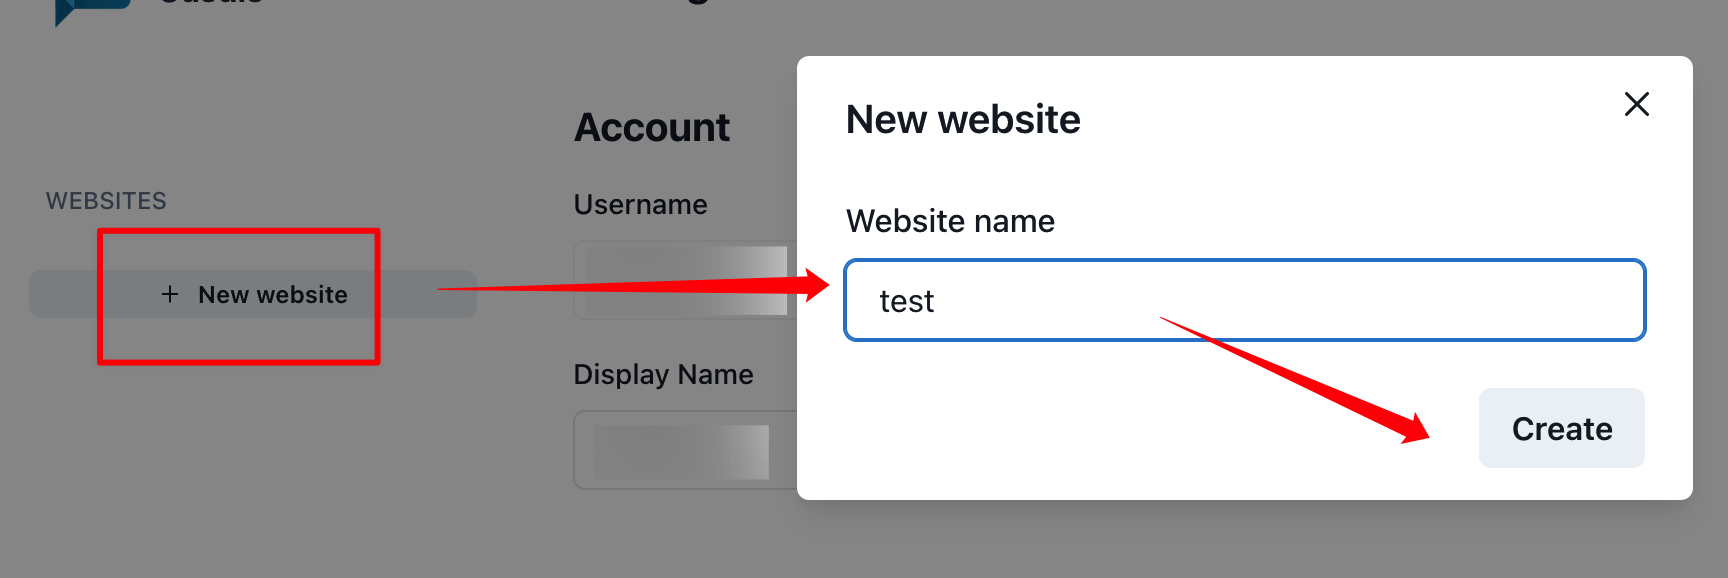
点击左上角New website. 填写网站名字完成创建。
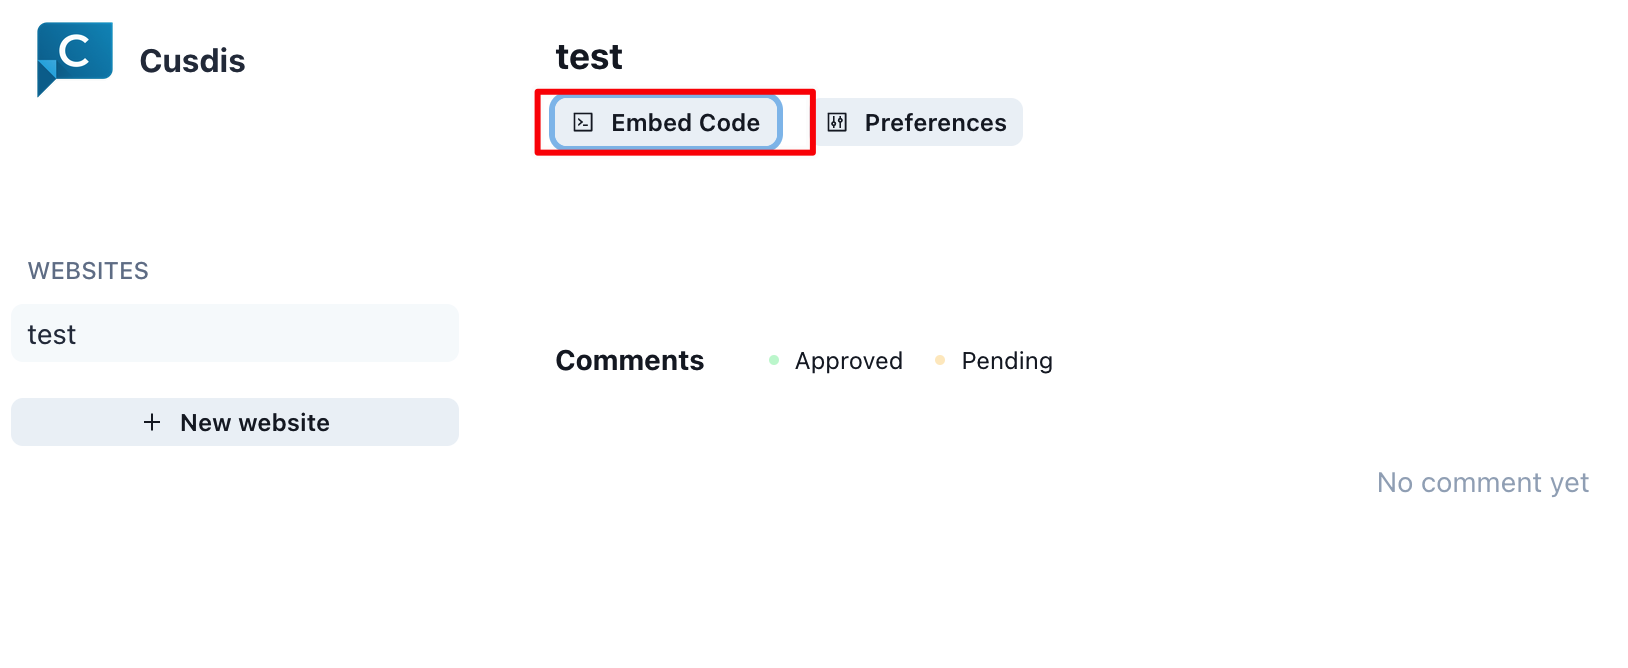
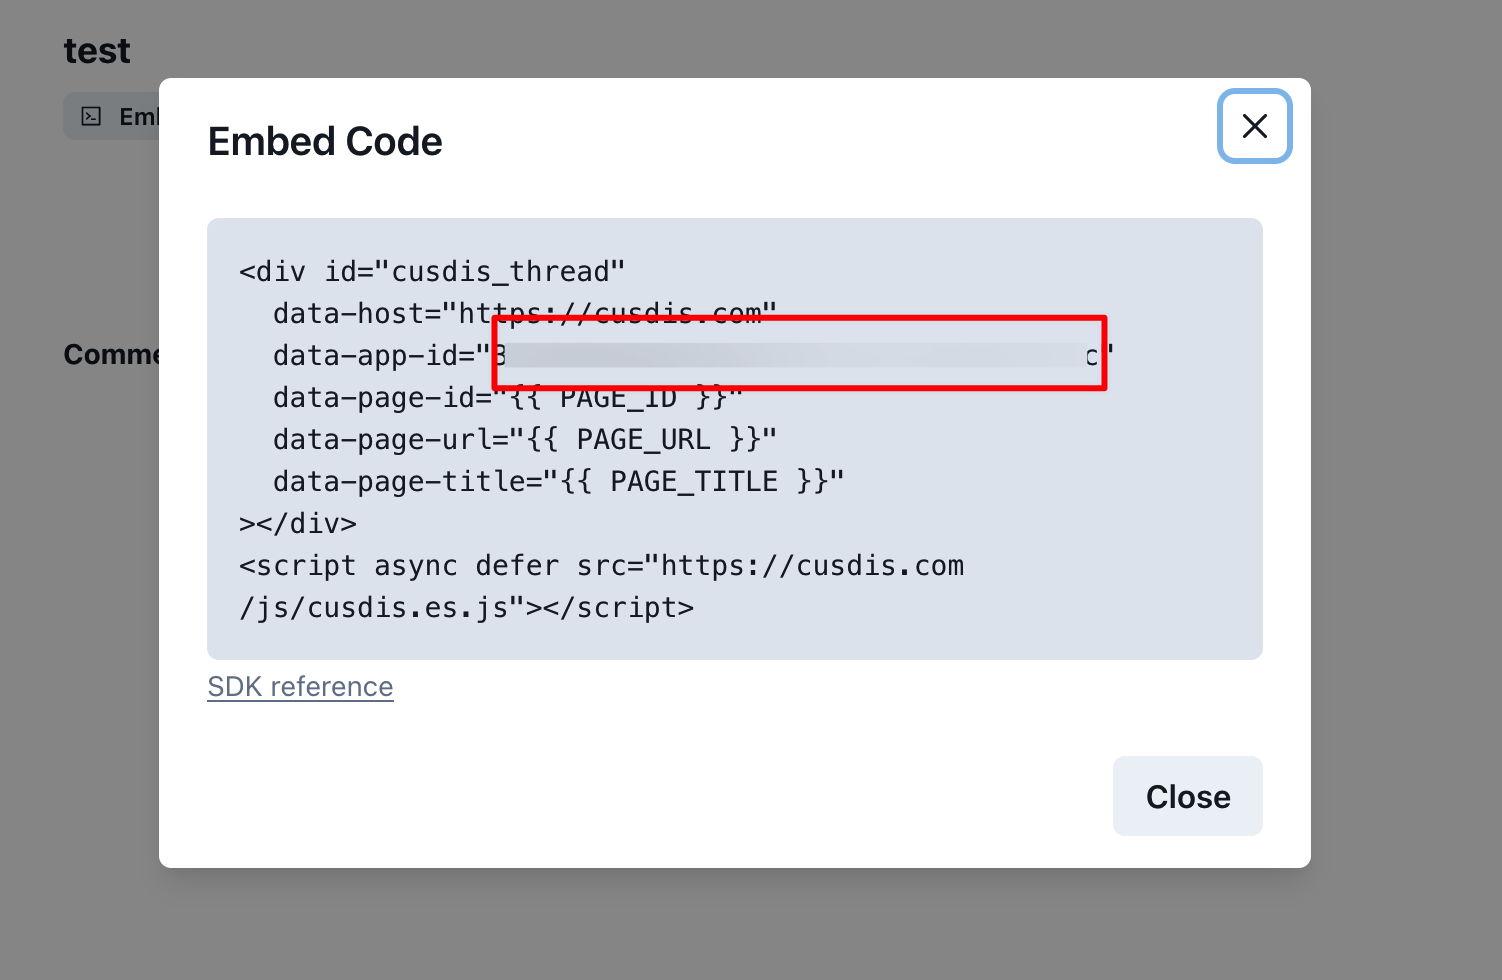
点击Embed Code获取您的应用ID,即data-app-id, 复制这串id备用。
配置NotionNext
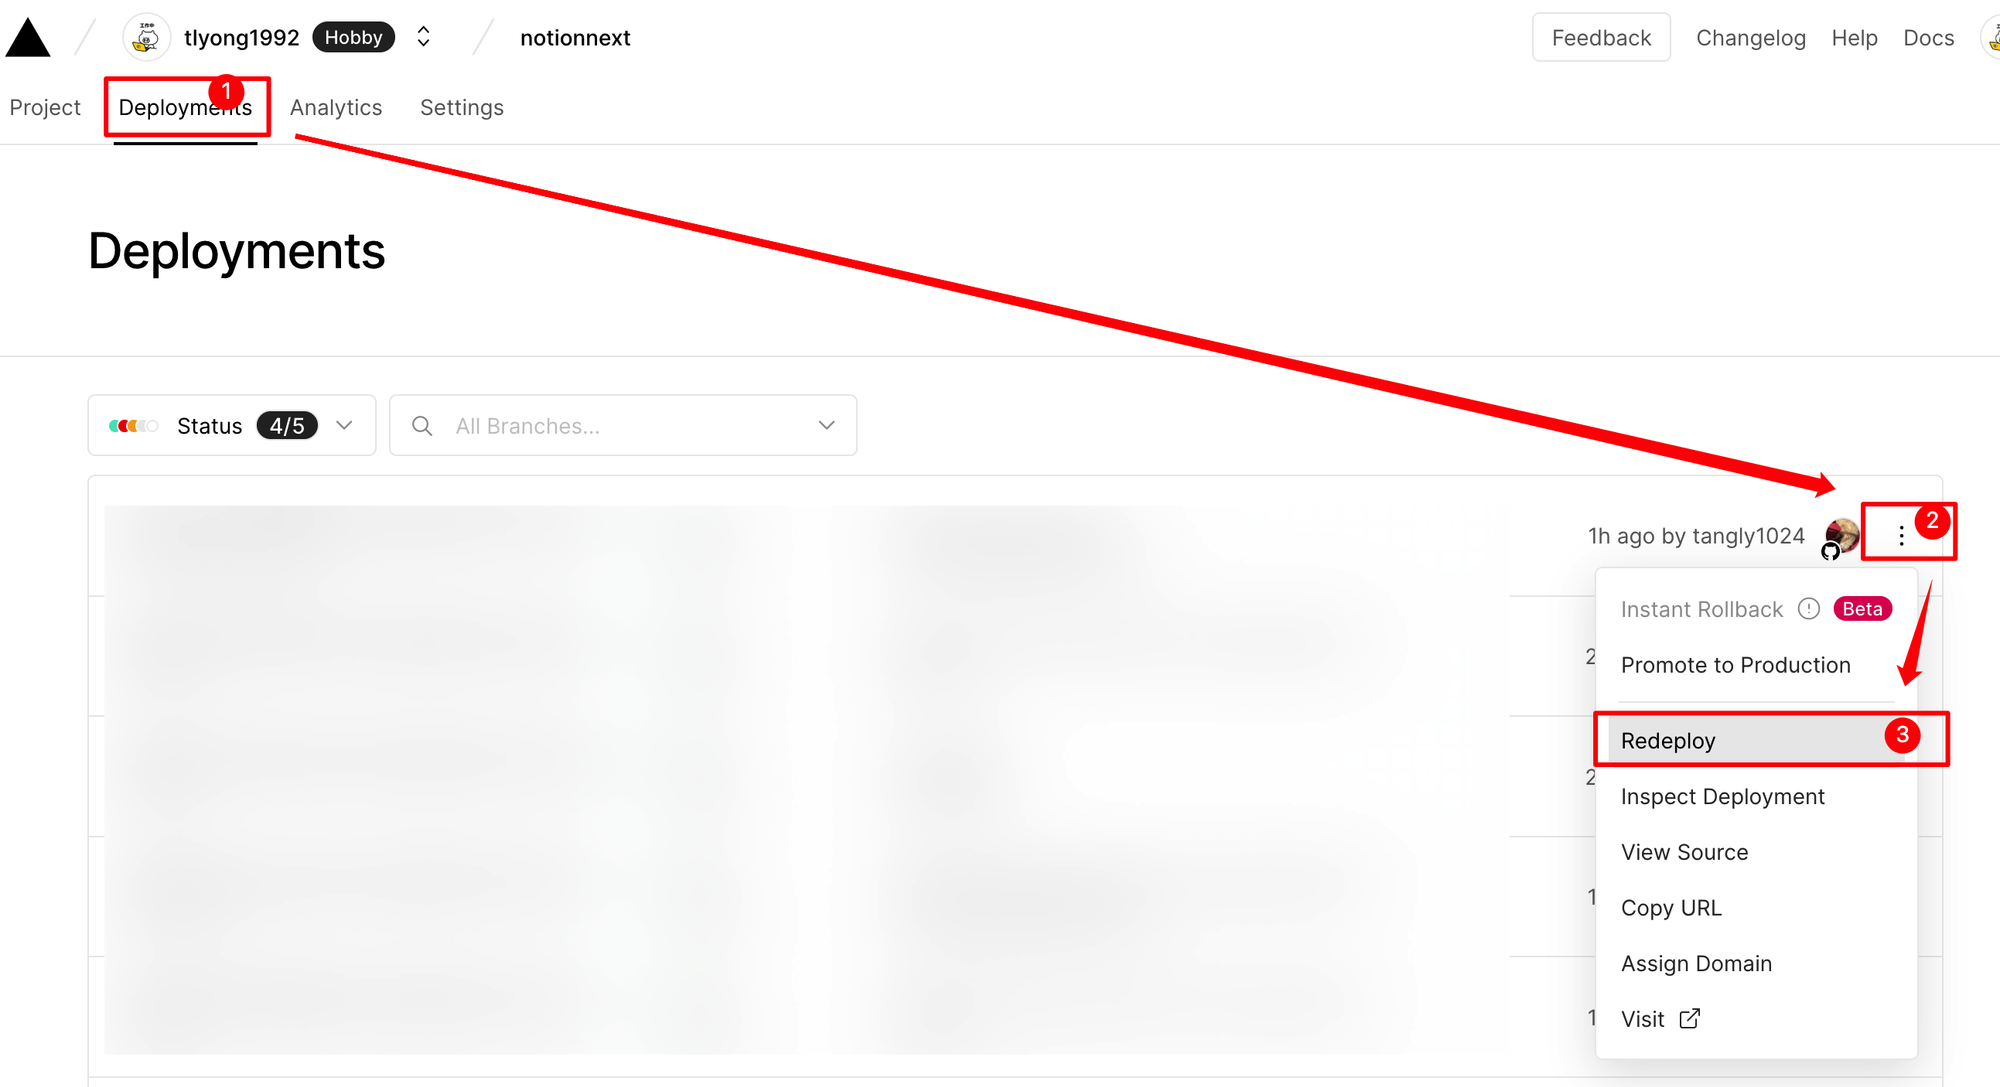
在Vercel后台添加一个环境变量 NEXT_PUBLIC_COMMENT_CUSDIS_APP_ID,值为上面获取到的data-app-id。
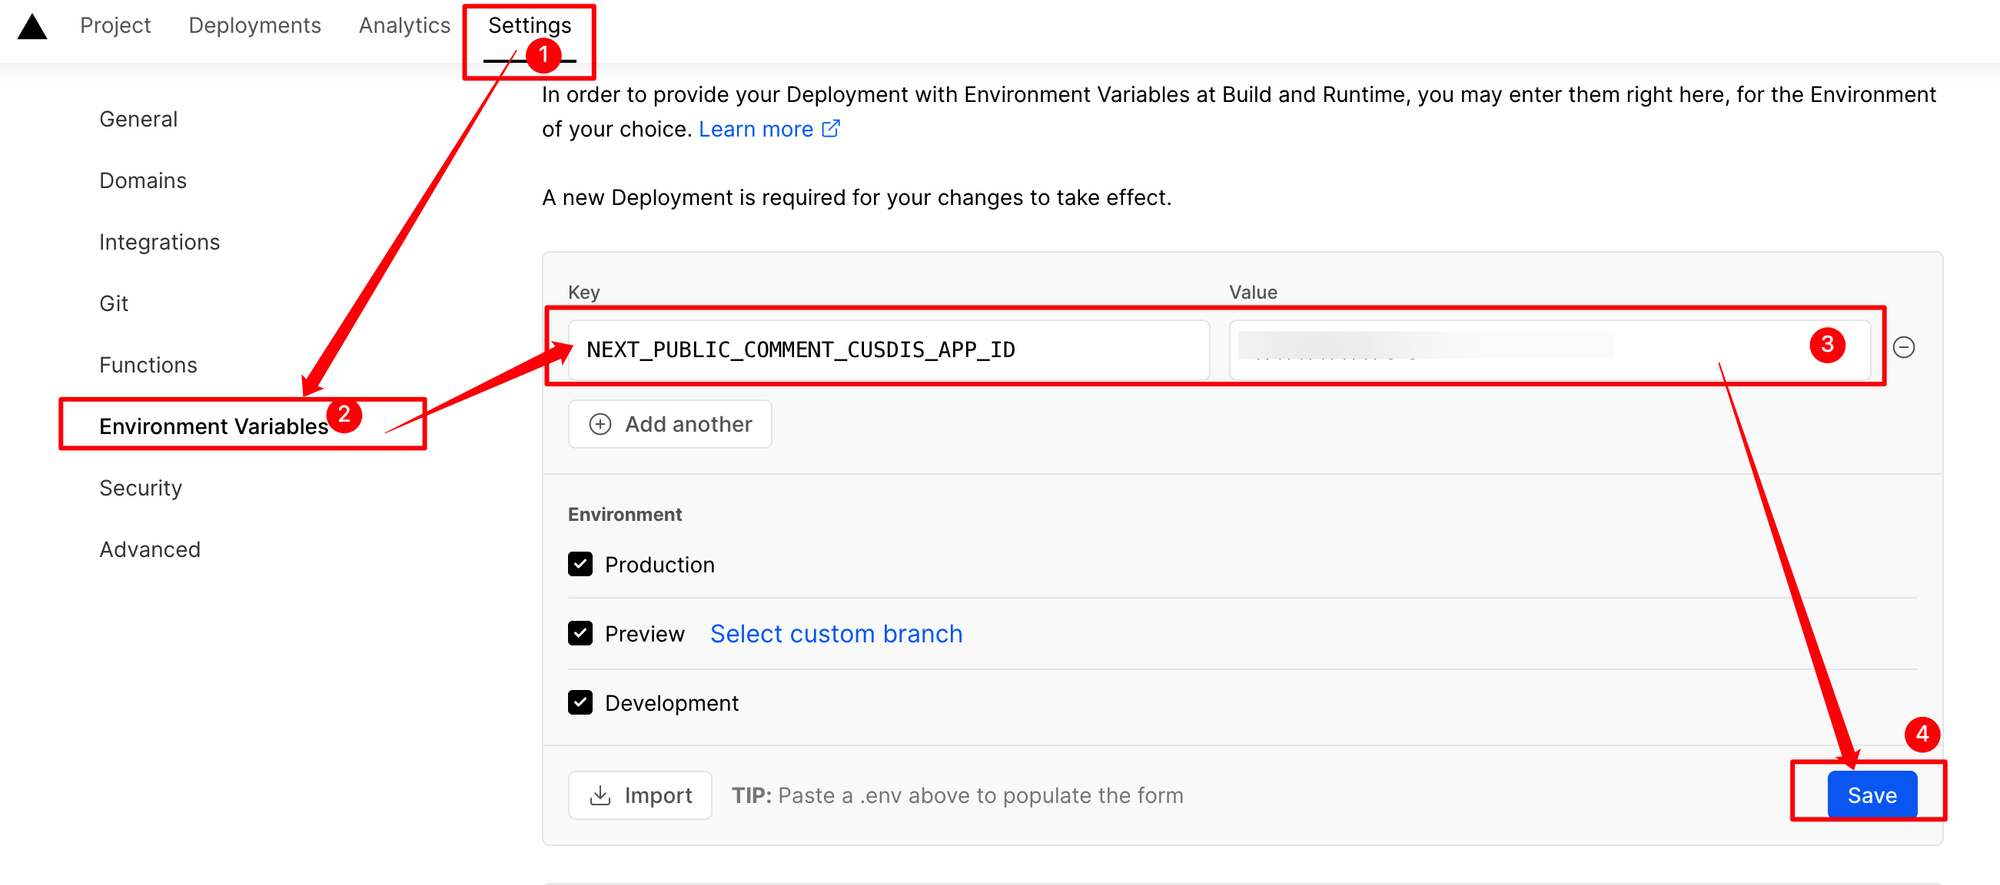
添加完环境变量记得Redploy项目。

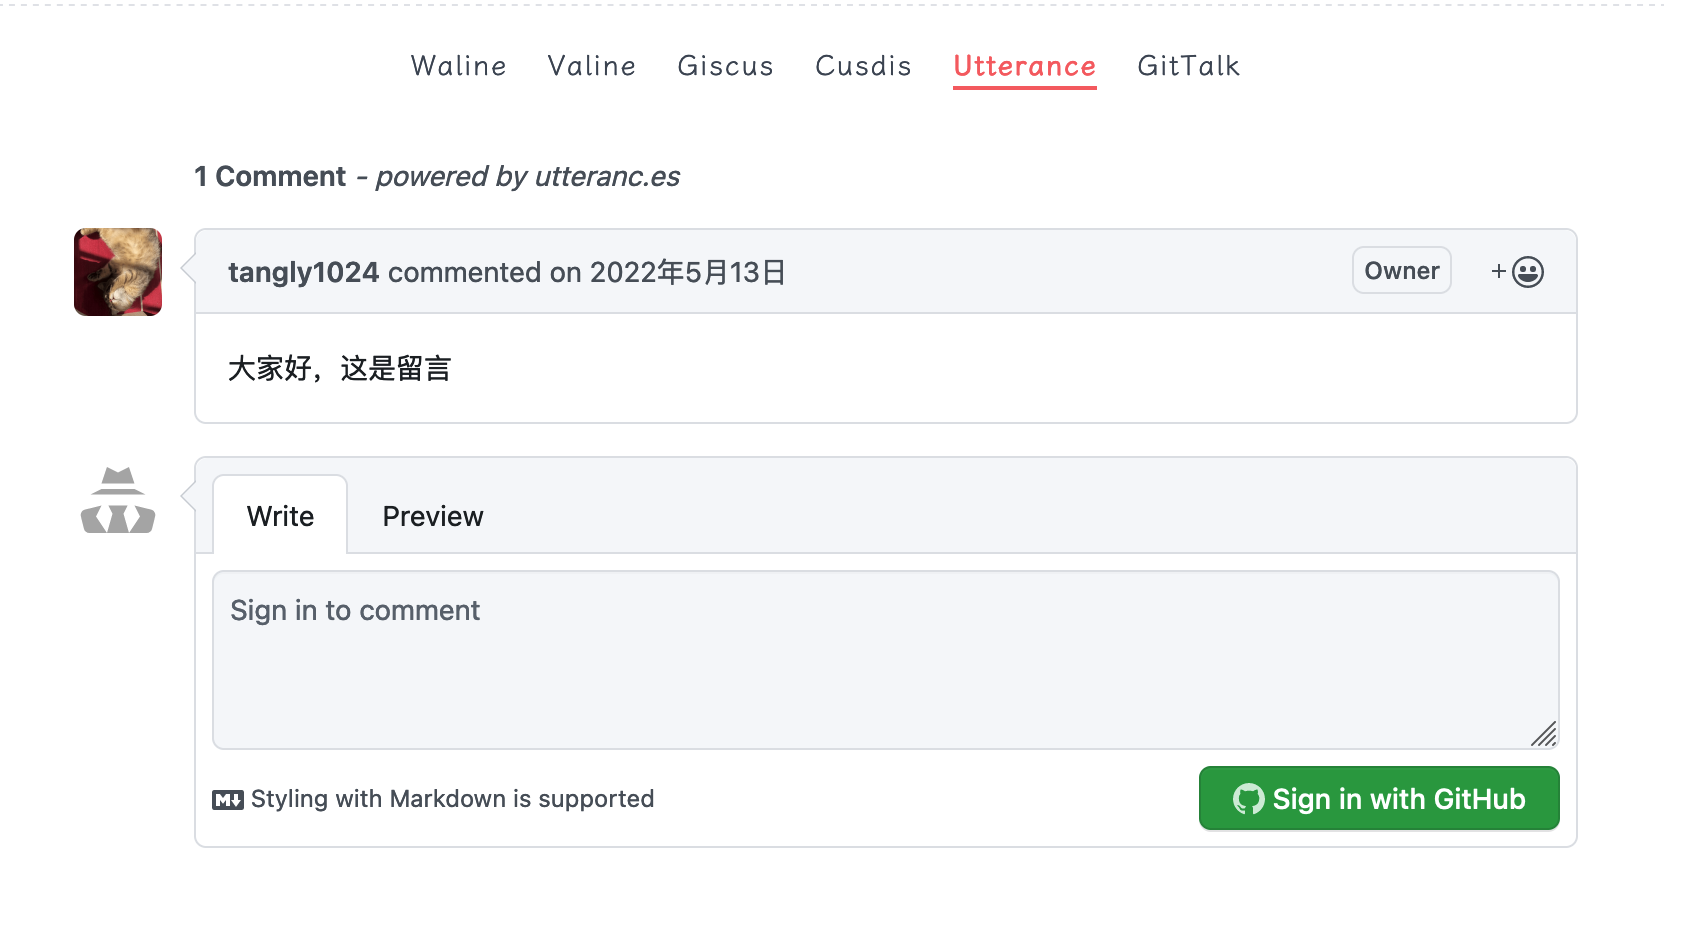
2. Utterance
完成预览效果
配置utterance
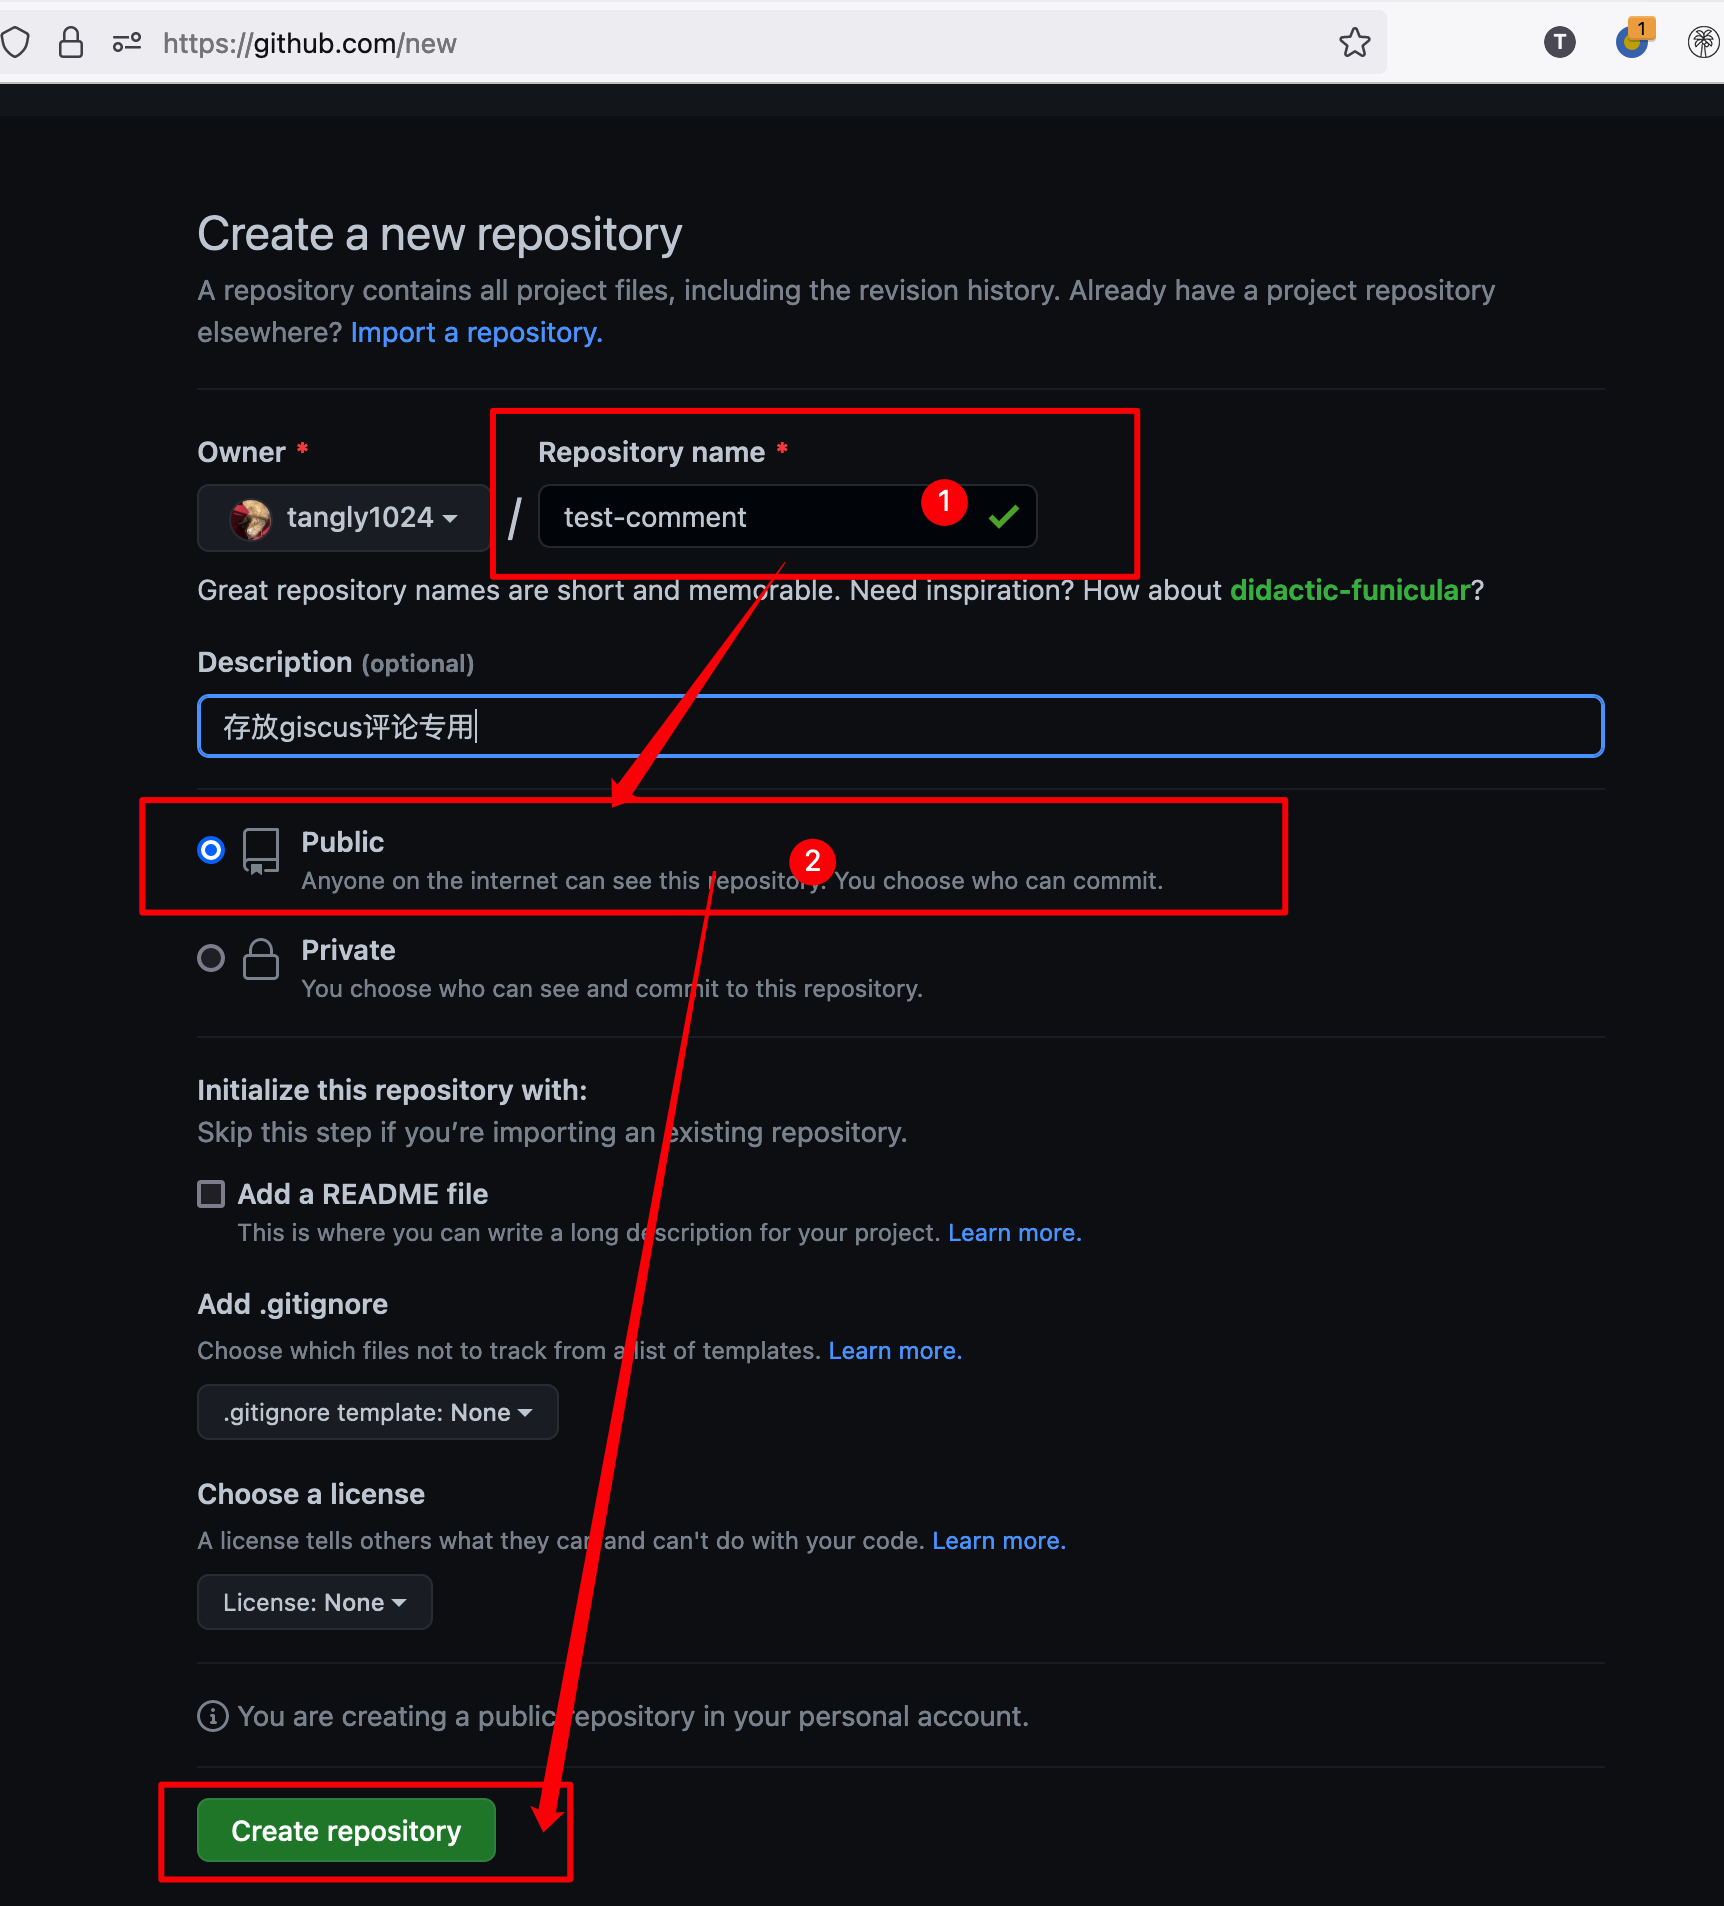
在您的Github中创建一个开源项目用于存放评论


在github中安装utterance插件
访问此地址安装:https://github.com/apps/utterances , 点击右上角install即可
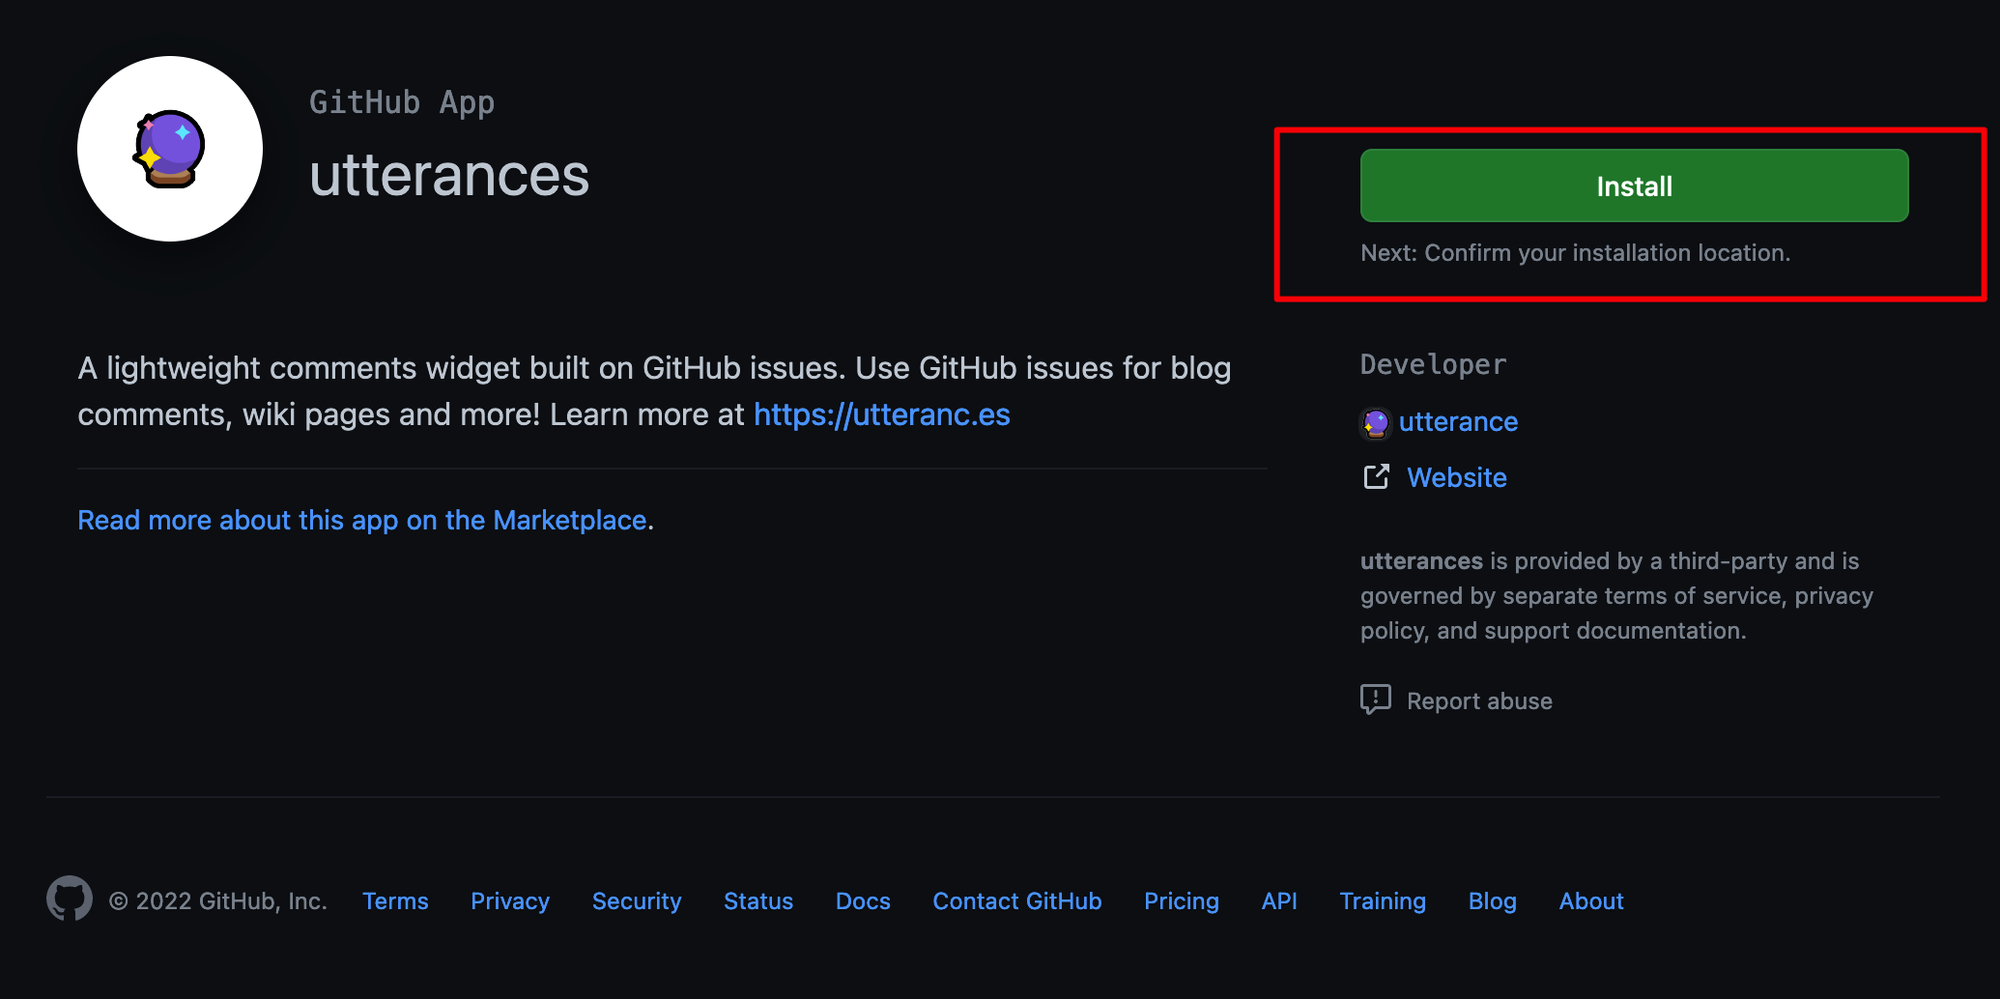
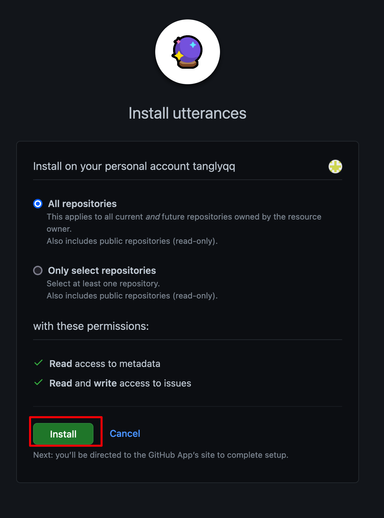
允许utterance访问所有仓库,并勾选install,可以只勾选作为评论用的仓库地址。
配置NotionNext
将用作评论仓库名添加到Vercel添加环境变量
后台
settings→ environment variables → 添加 → save 即可。如下图:
注意,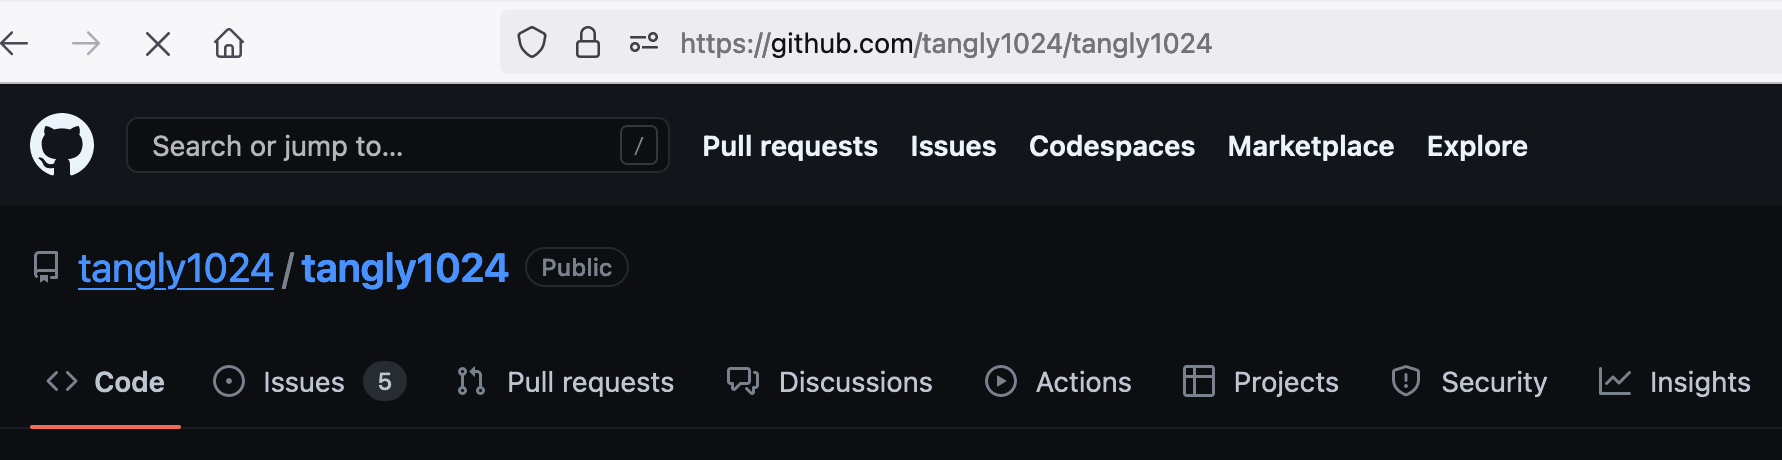
仓库名的格式是 [您的用户名/您的仓库名] 如下示例添加后的效果

添加完环境变量记得Redploy项目。
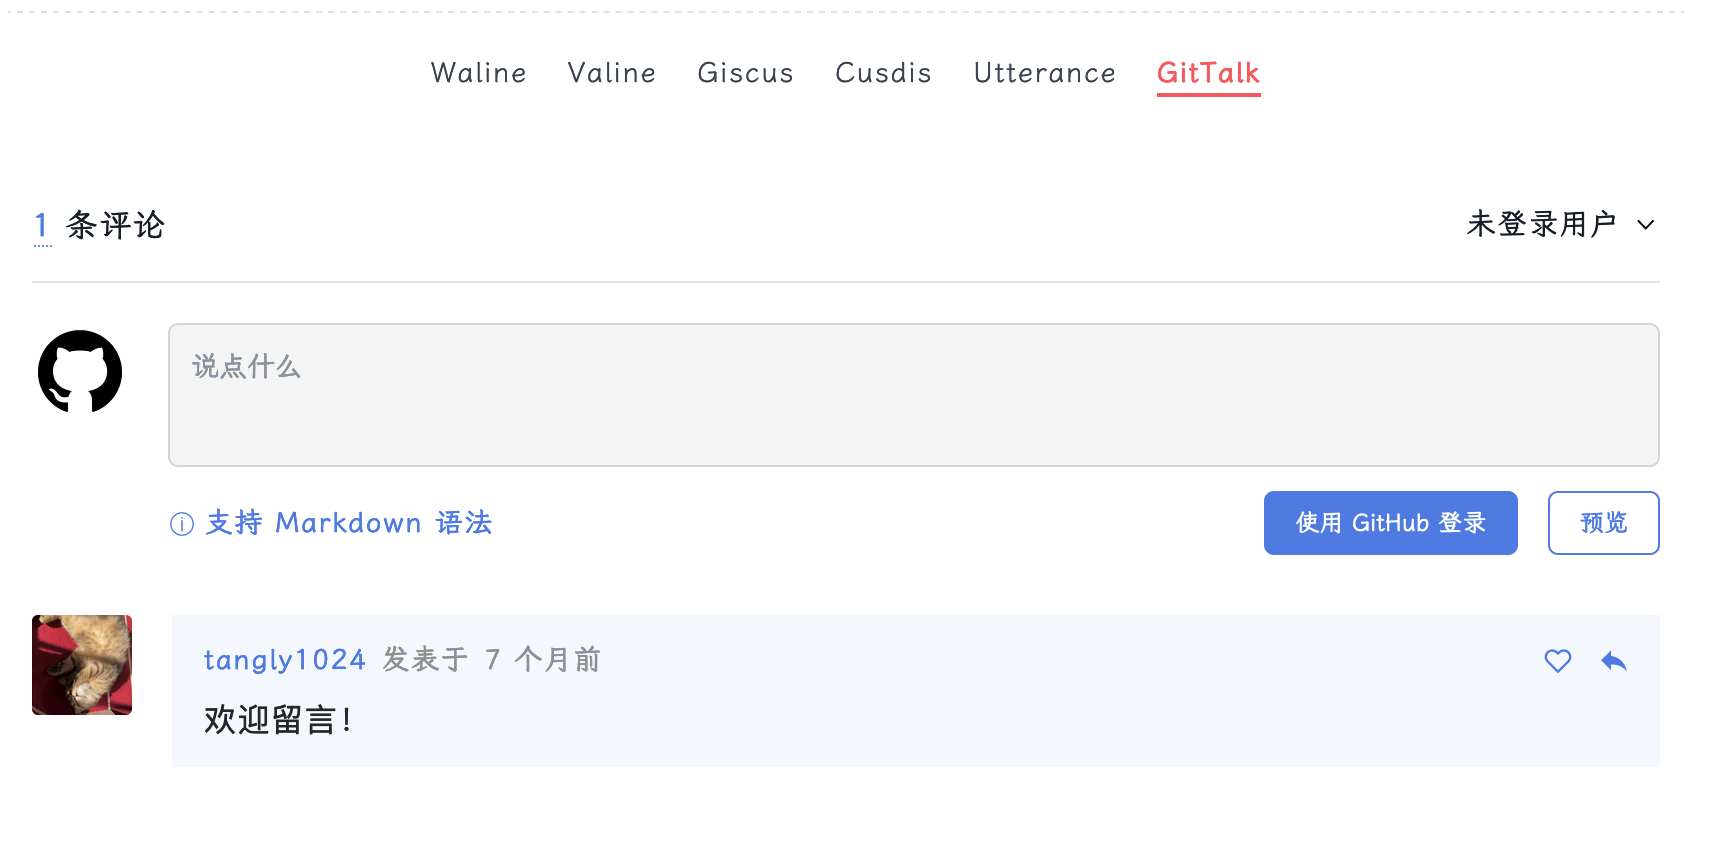
3. Gitalk
完成预览效果
配置gitalk

创建一个授权秘钥,并保存您的ClientID与ClientSecret
Authorization callback URL 填写您网站域名
填写配置的效果 ,点击
register application 即可创建。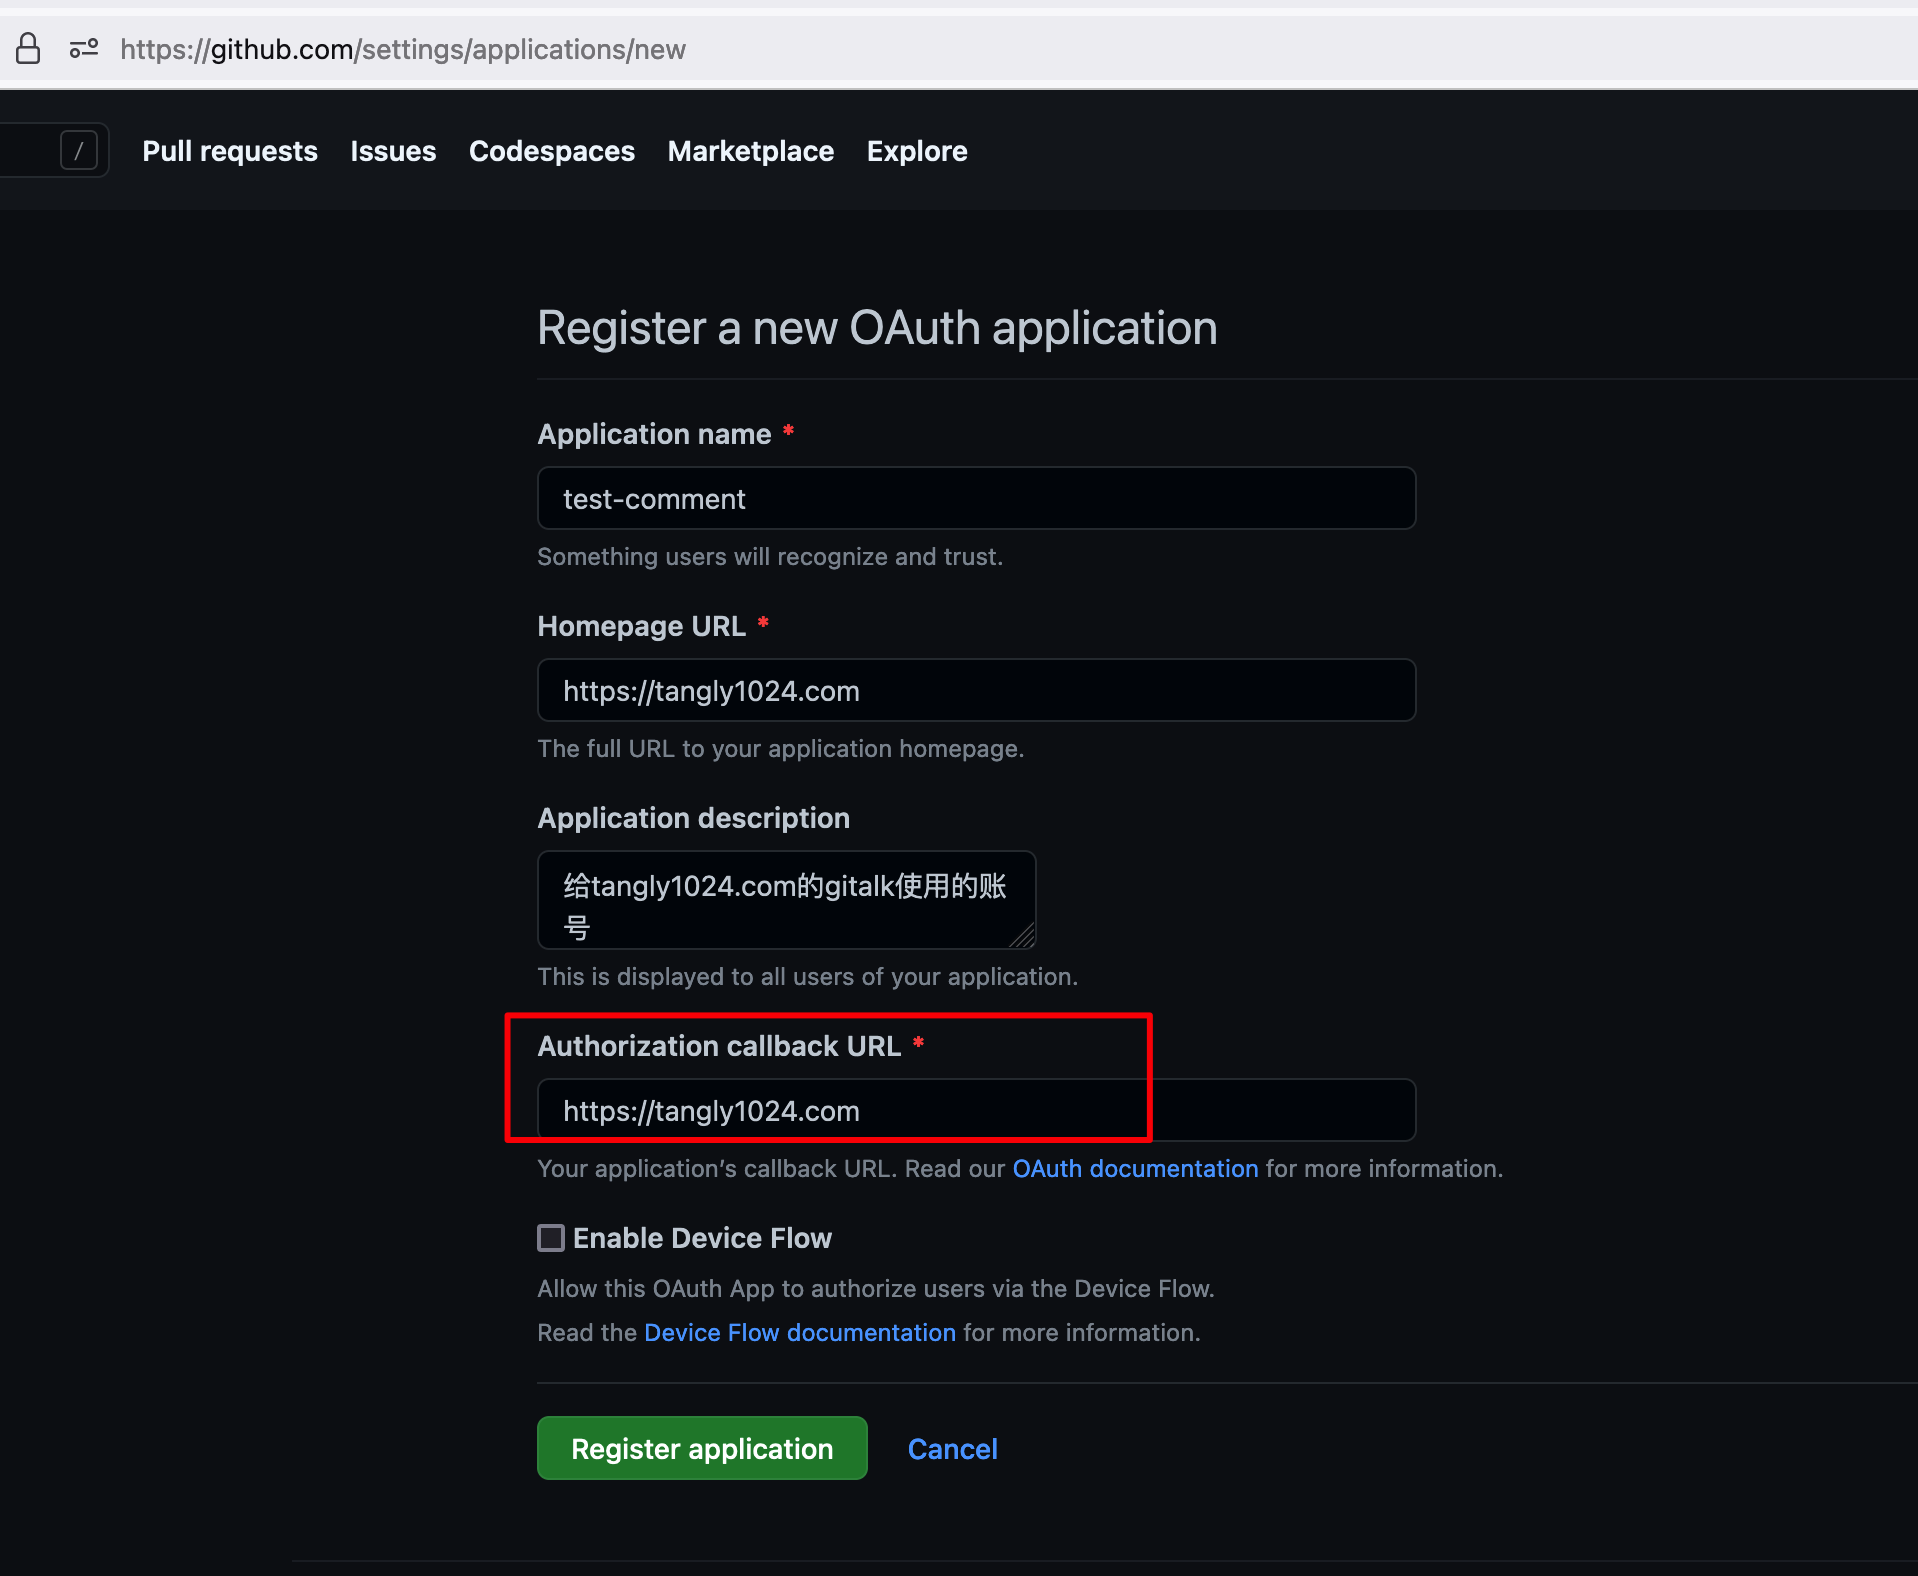
点击
Generate a new client secret 生成您的密码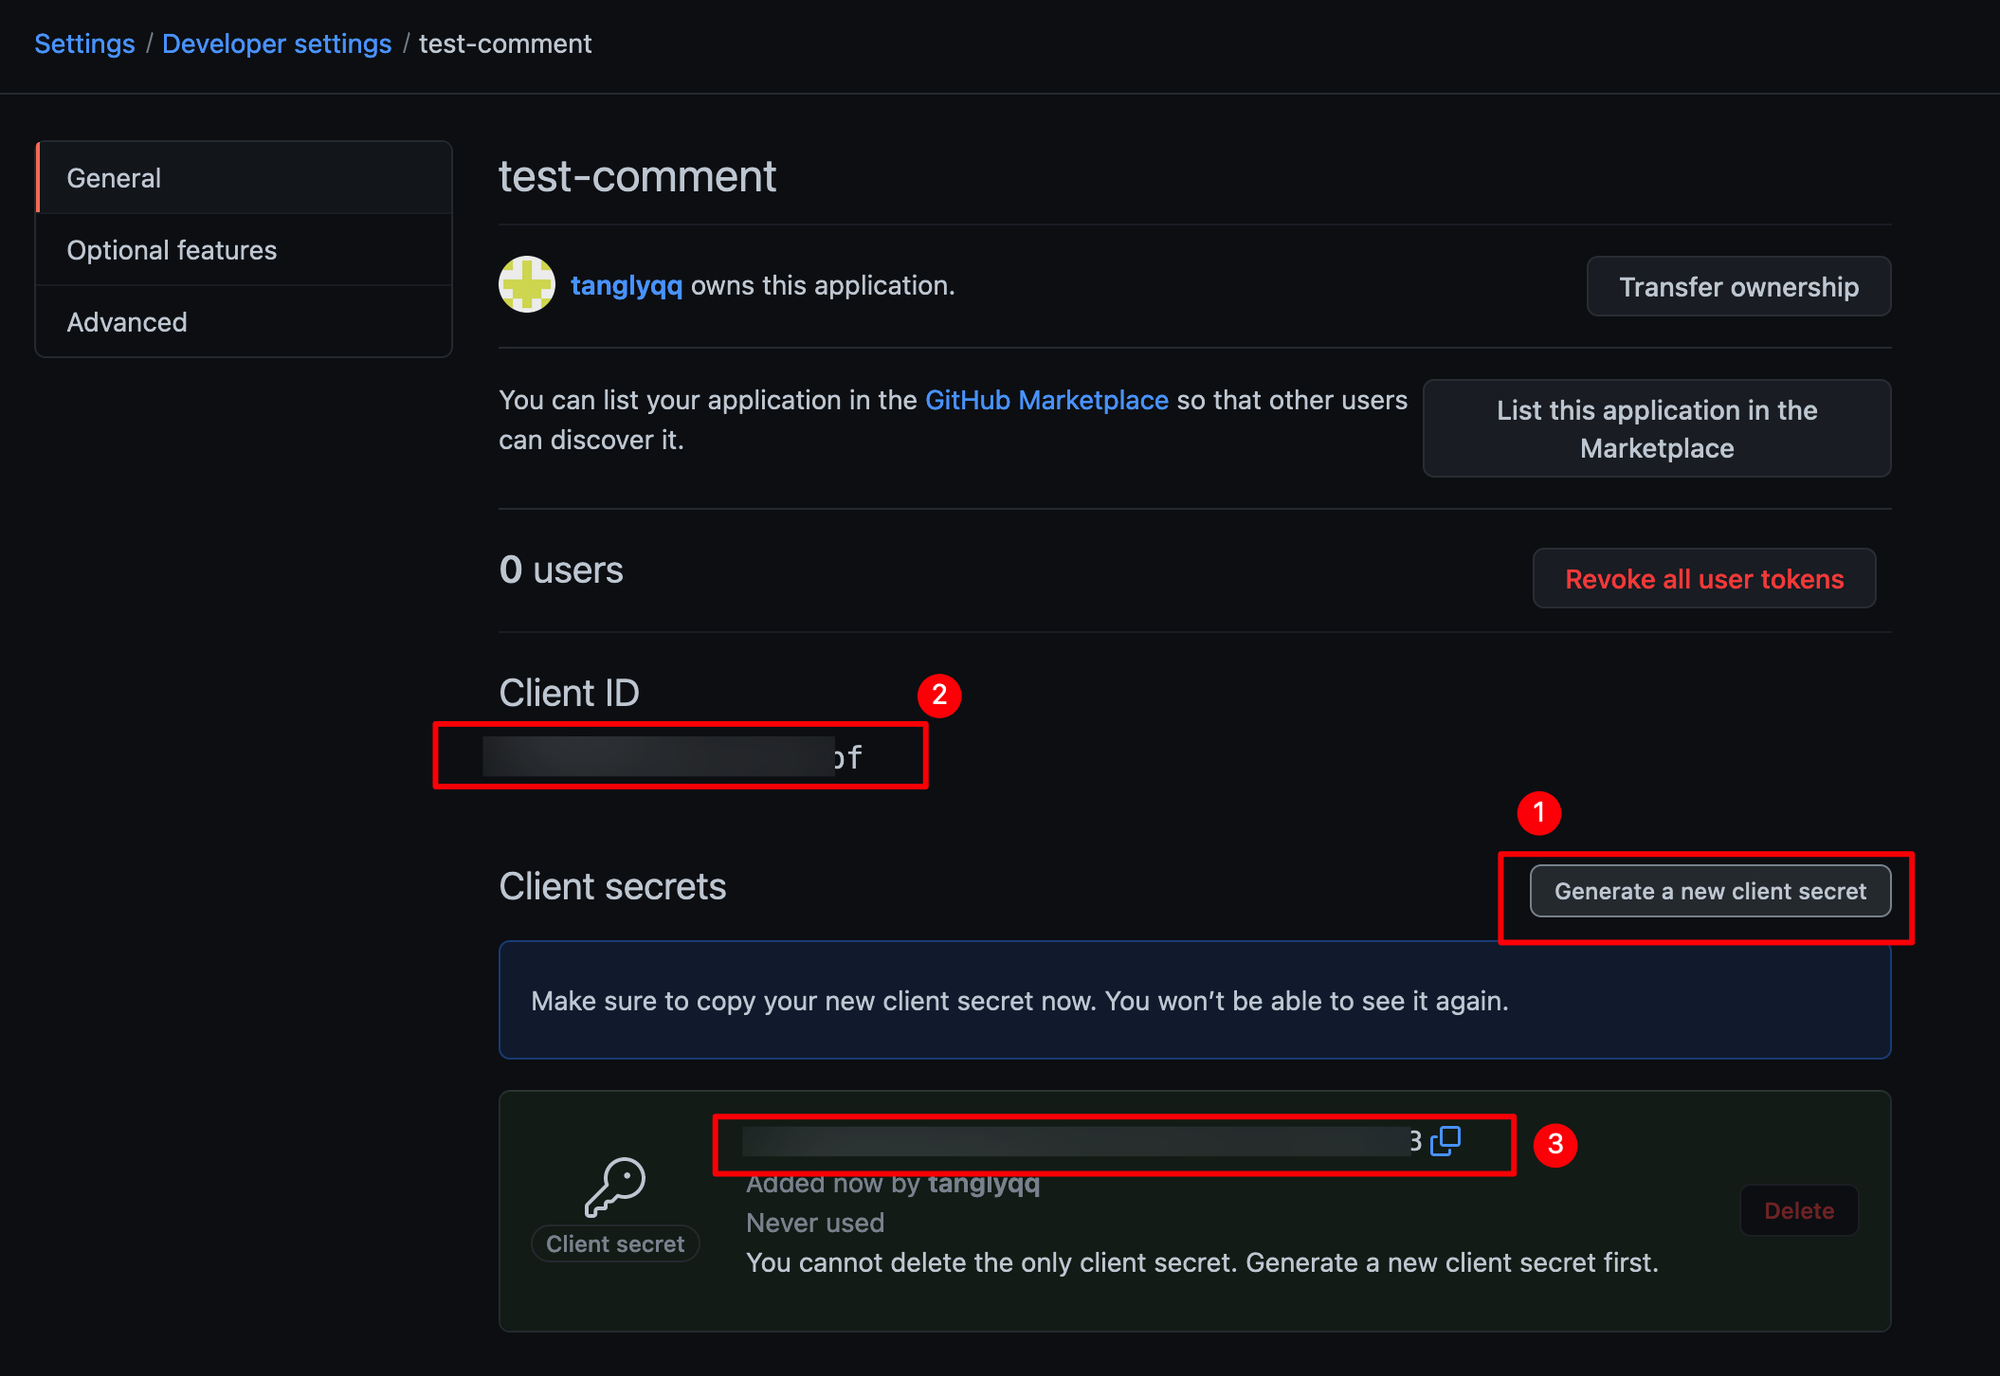
复制
Client ID和刚生成的 Client secret (对应图中2和3)备用。配置 NotionNext
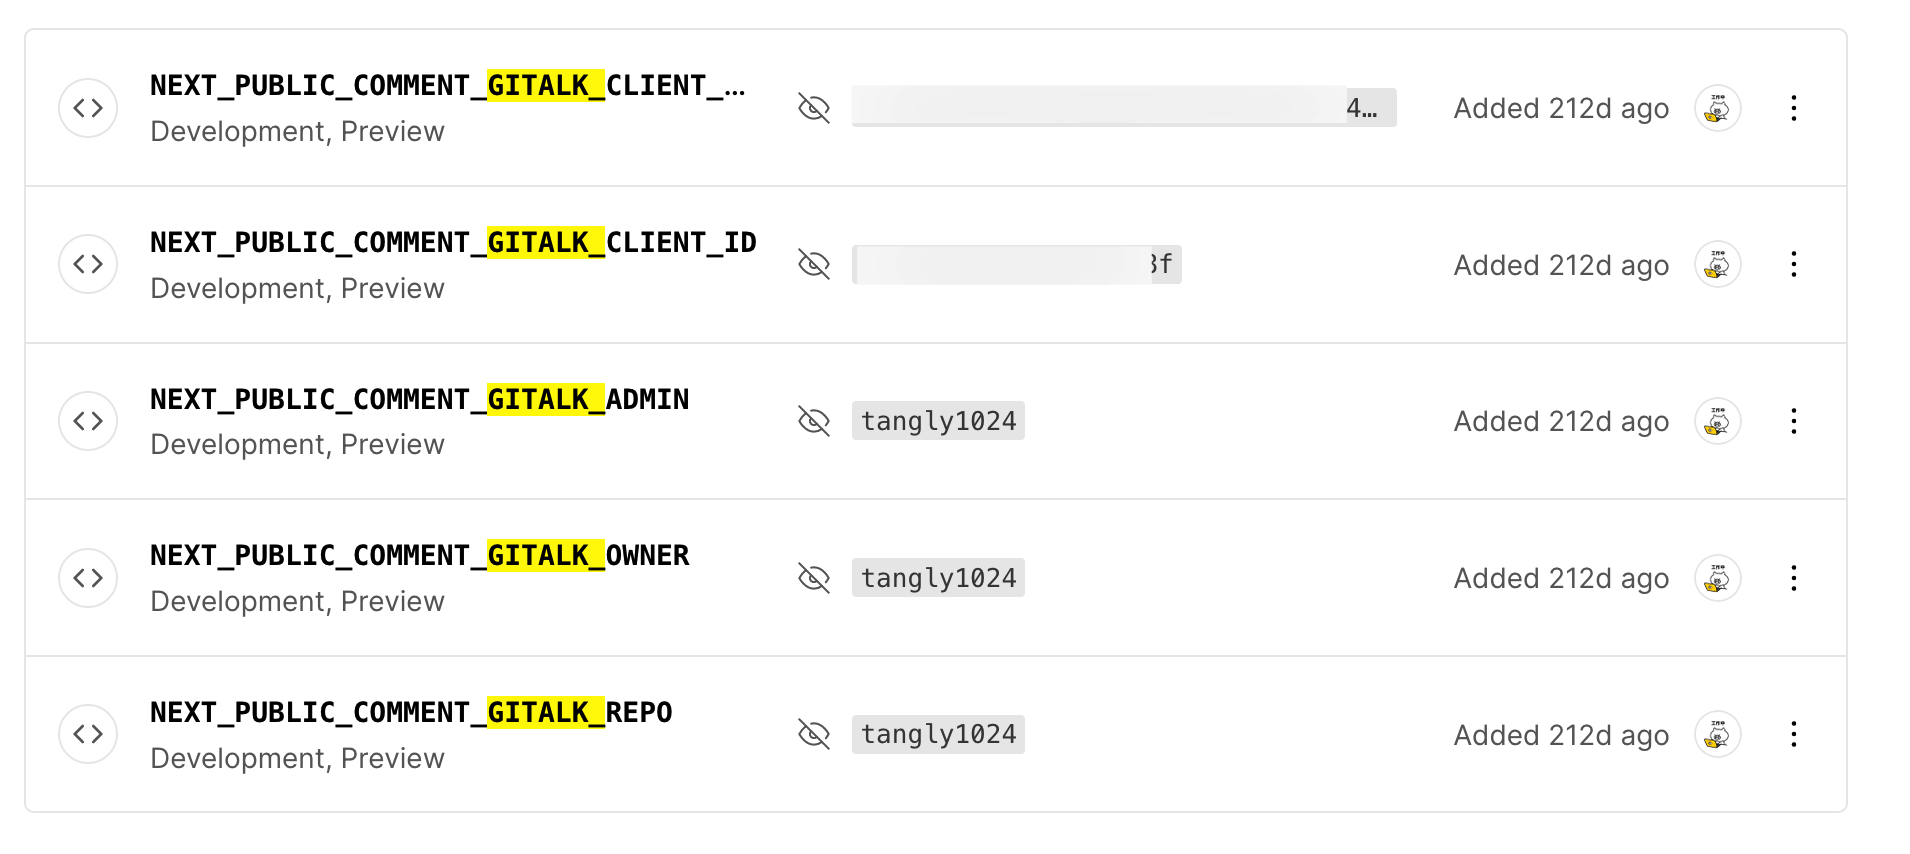
在Vercel后台配置环境变量
gitalk参数和vercel环境变量的映射关系
gitalk参数名 | vercel变量名 |
ClientID | NEXT_PUBLIC_COMMENT_GITALK_CLIENT_ID |
ClientSecret | NEXT_PUBLIC_COMMENT_GITALK_CLIENT_SECRET |
vercel后台需要添加5个变量
变量名 | 变量 说明 |
NEXT_PUBLIC_COMMENT_GITALK_CLIENT_ID | 填写 ClientID 的值 |
NEXT_PUBLIC_COMMENT_GITALK_CLIENT_SECRET | 填写 ClientSecret 的值 |
NEXT_PUBLIC_COMMENT_GITALK_CLIENT_ADMIN | 填写您的github用户名 |
NEXT_PUBLIC_COMMENT_GITALK_CLIENT_OWNER | 填写您的github用户名 |
NEXT_PUBLIC_COMMENT_GITALK_CLIENT_REPO | 填写您的仓库名 |
添加完环境变量记得Redploy项目。

4.Giscus
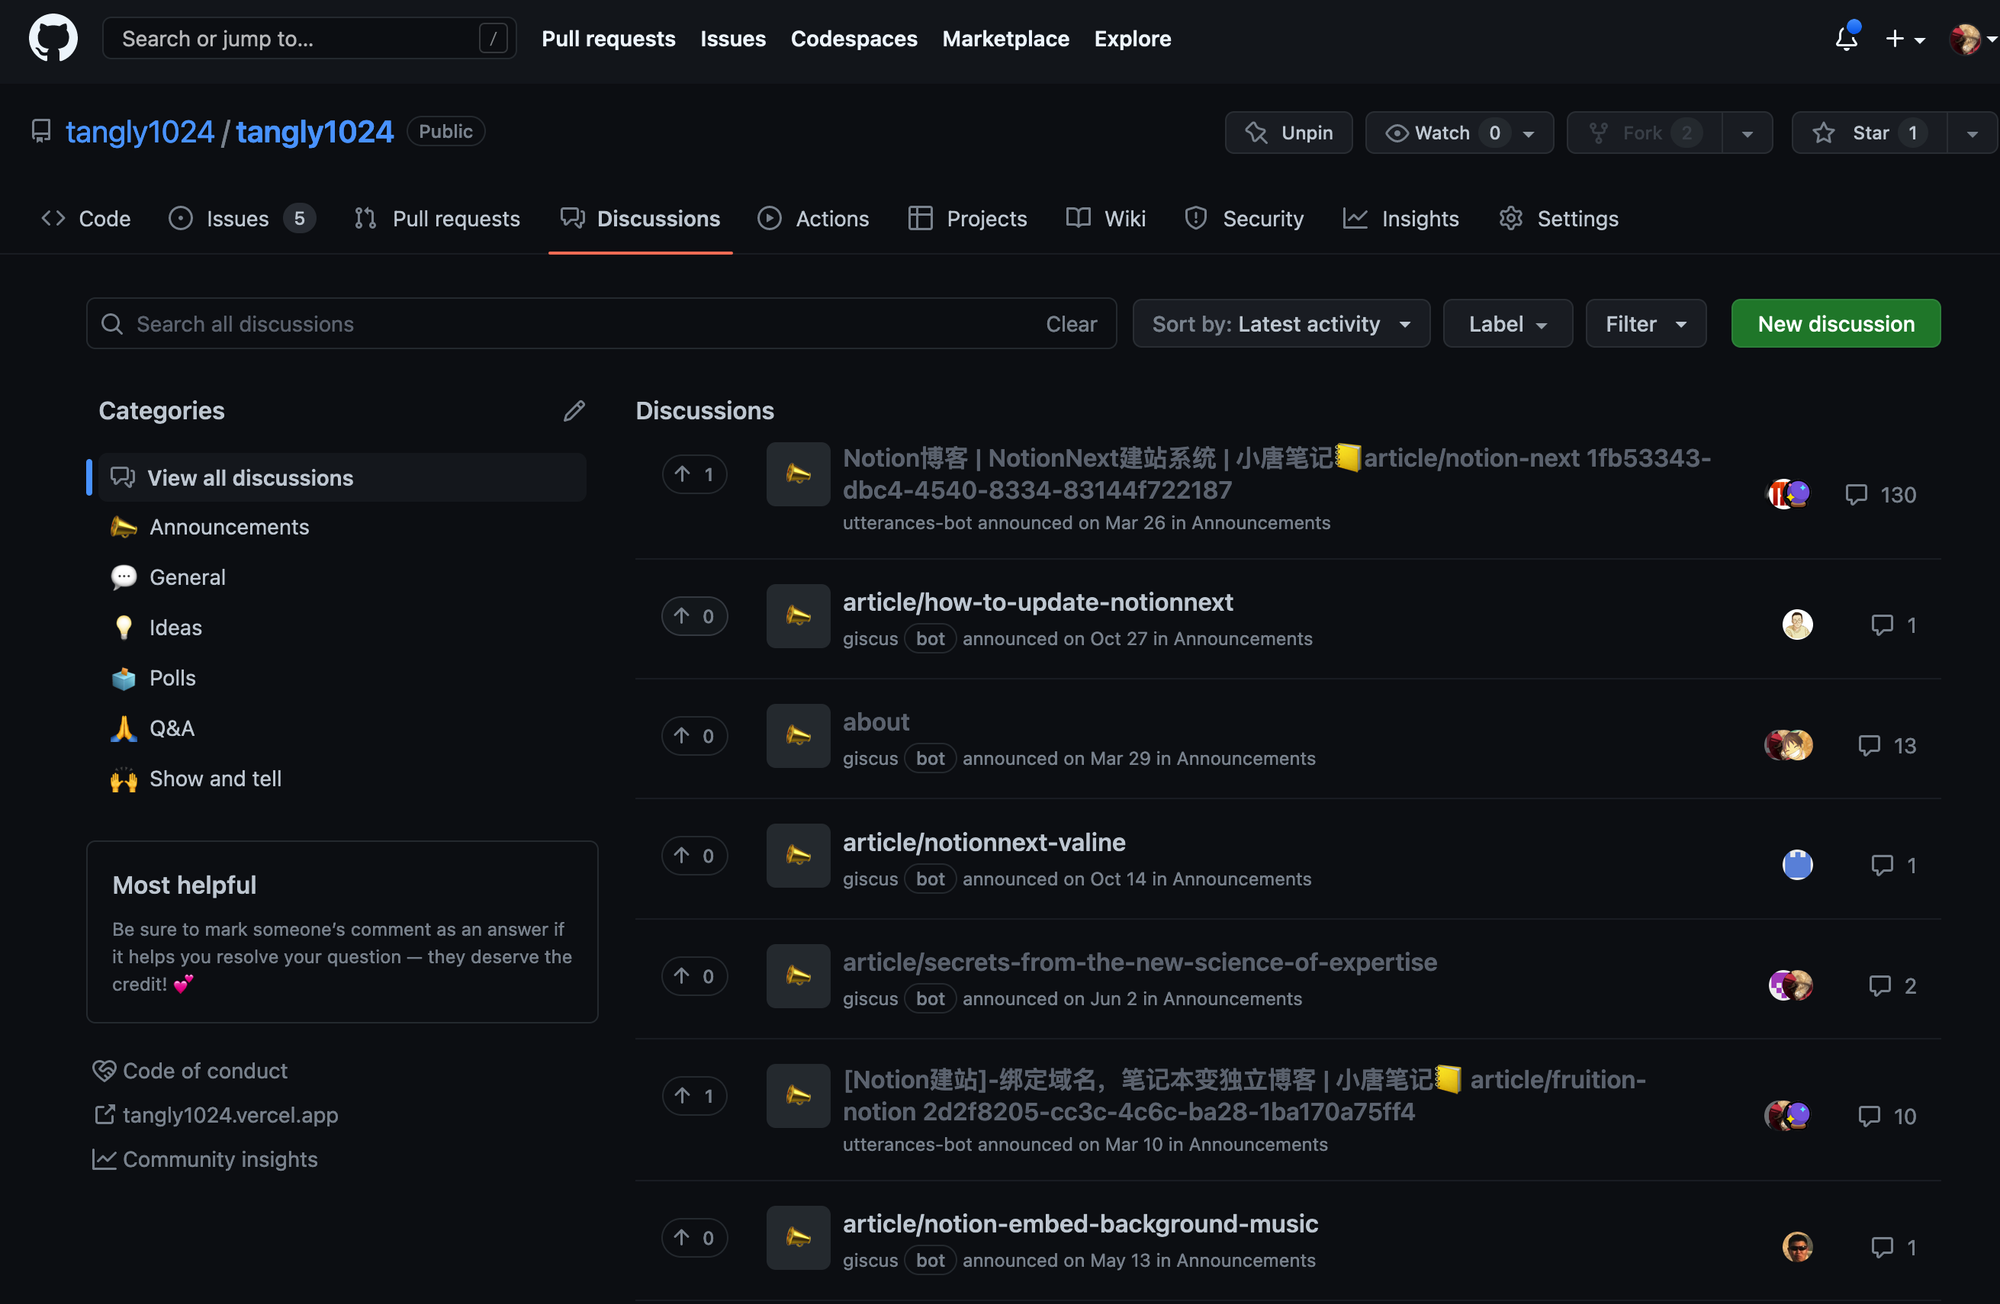
项目会在您的Github项目讨论区创建评论数据,便于维护管理 ,
完成效果 预览
支持表情包评论

您可以在Github的Discusstion讨论区随时管理评论。
配置Giscus:


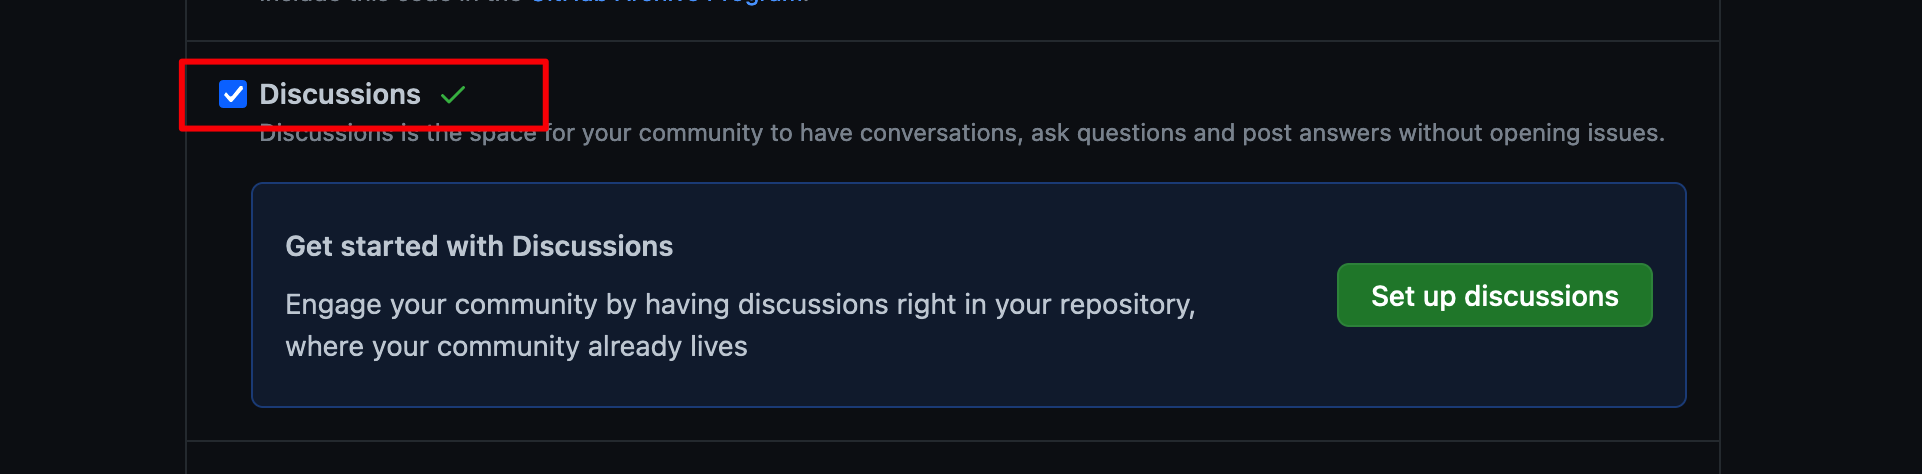
在项目Setting中开启discussion功能
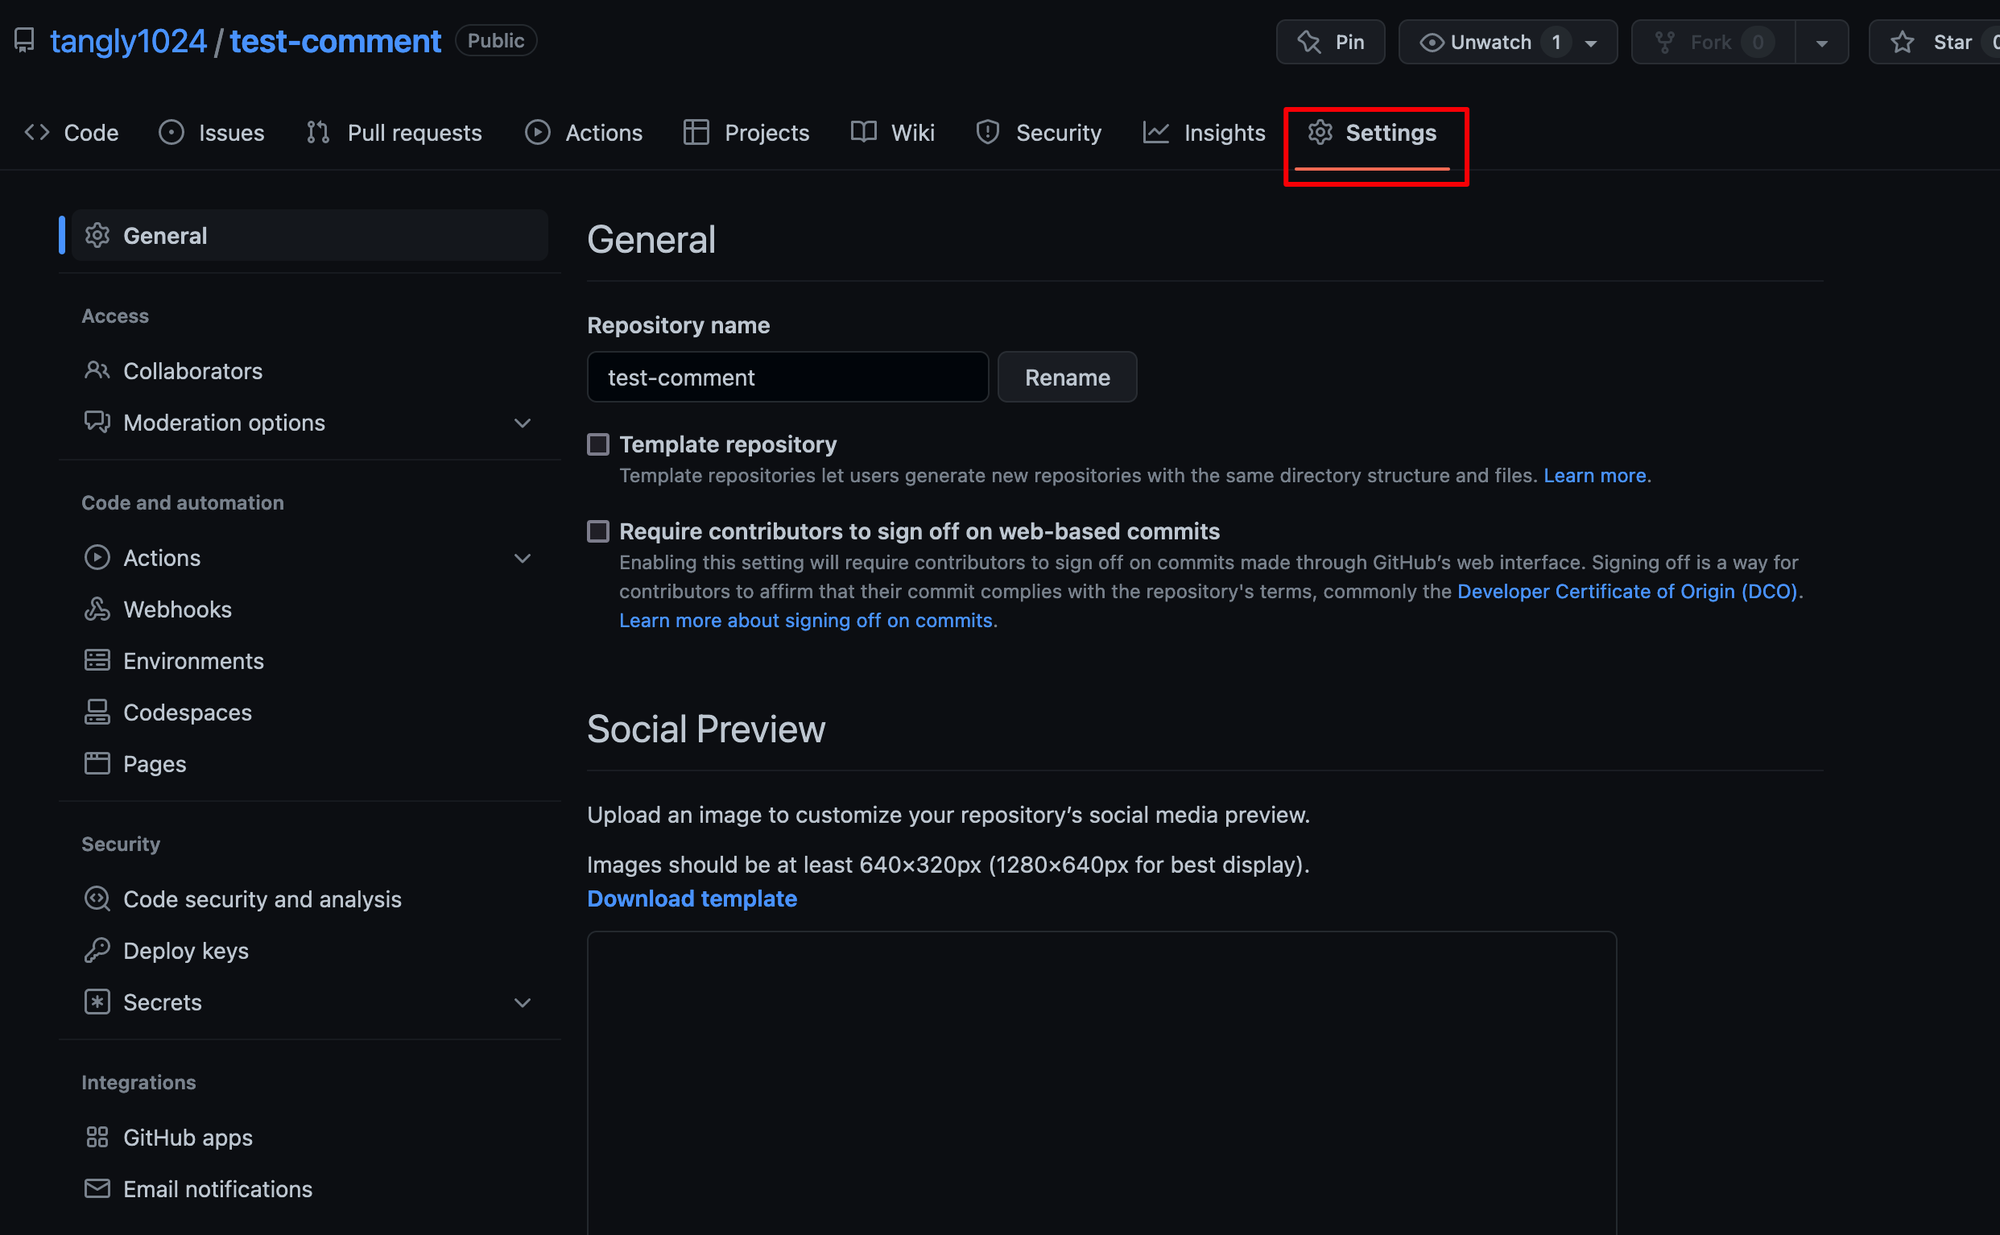
滚动到下方,找到Discussions并开启它
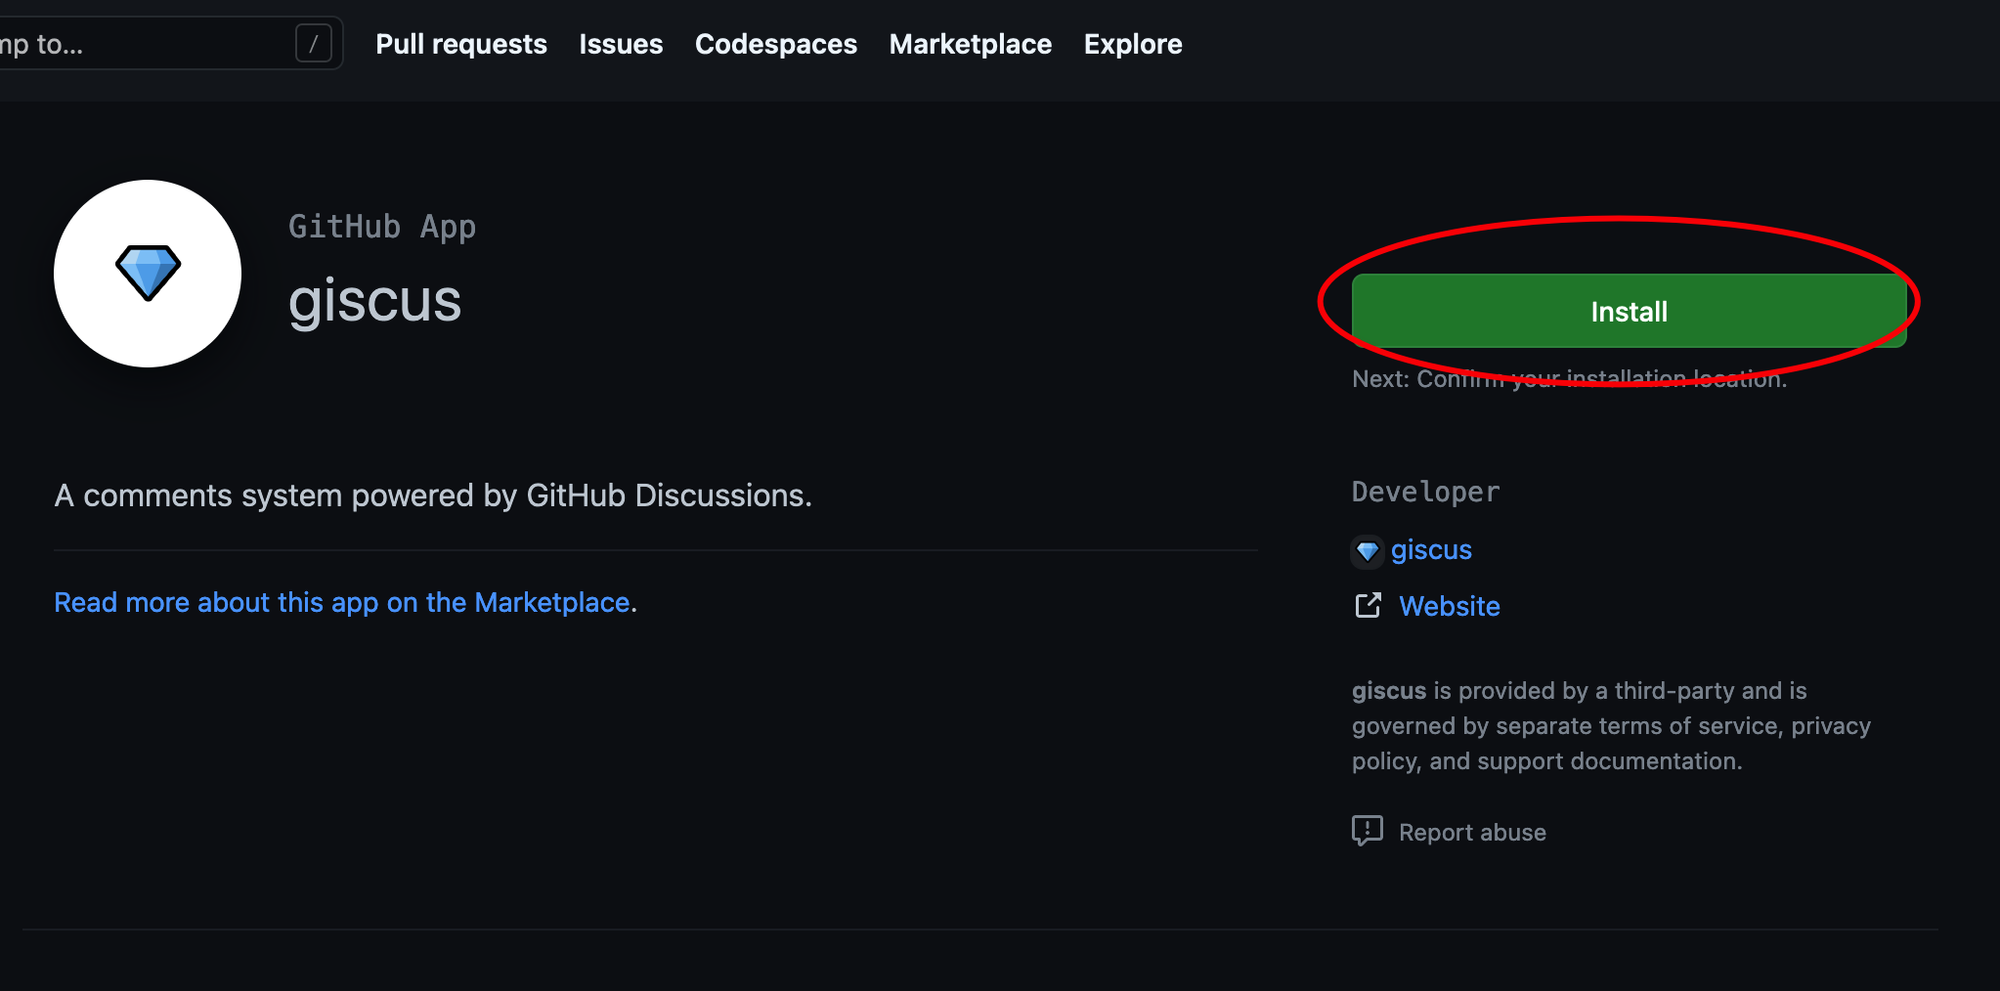
在Github中安装giscus应用
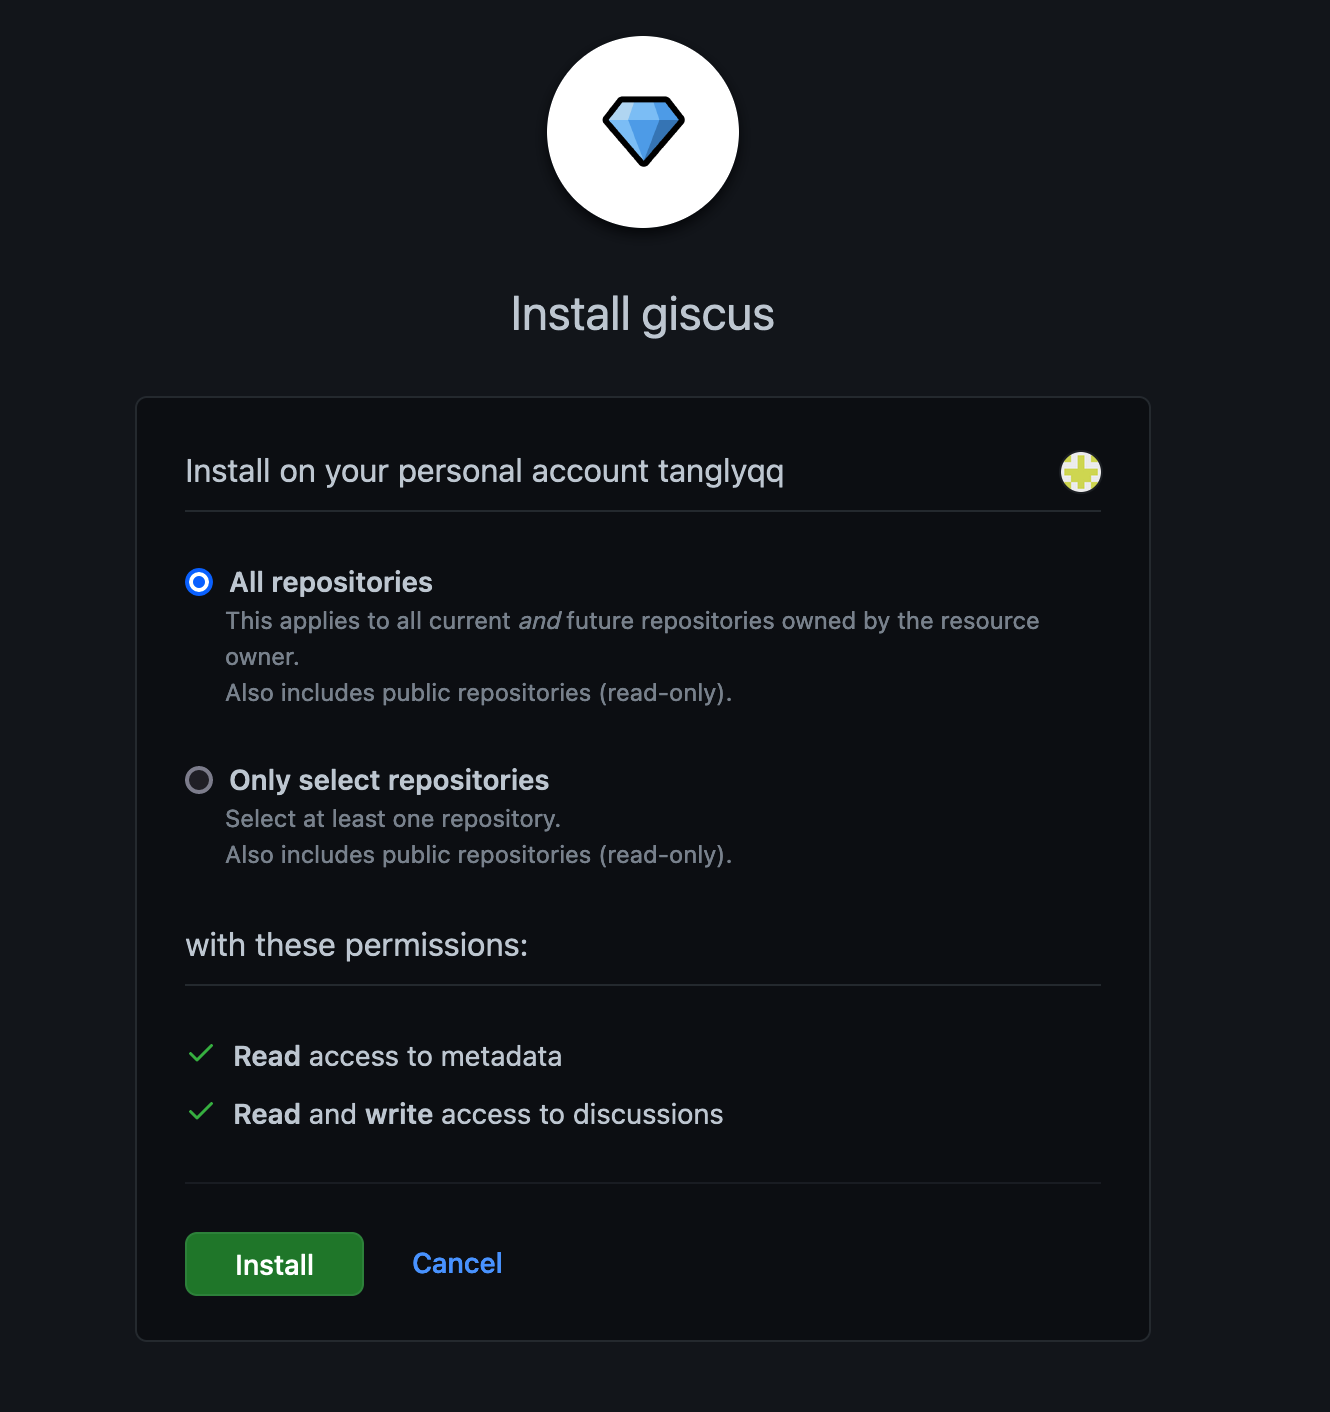
点击右上方的Install即可,并确认 允许访问仓库数据权限:
默认勾选All repositories即可。也可以只勾选用作评论的仓库,(后续还可以再回来配置)
访问Giscus填写并获取您的Giscus配置参数
访问 以下giscus地址:


主要配置输入您的仓库名,并选择
Discussion分类为 Announcements .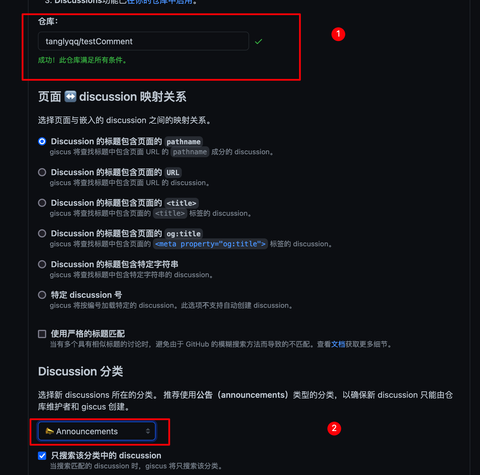
填写完成在页面下方可以 看到配置最重要的是
data-repo,data-repo-iddata-category-id 这三项。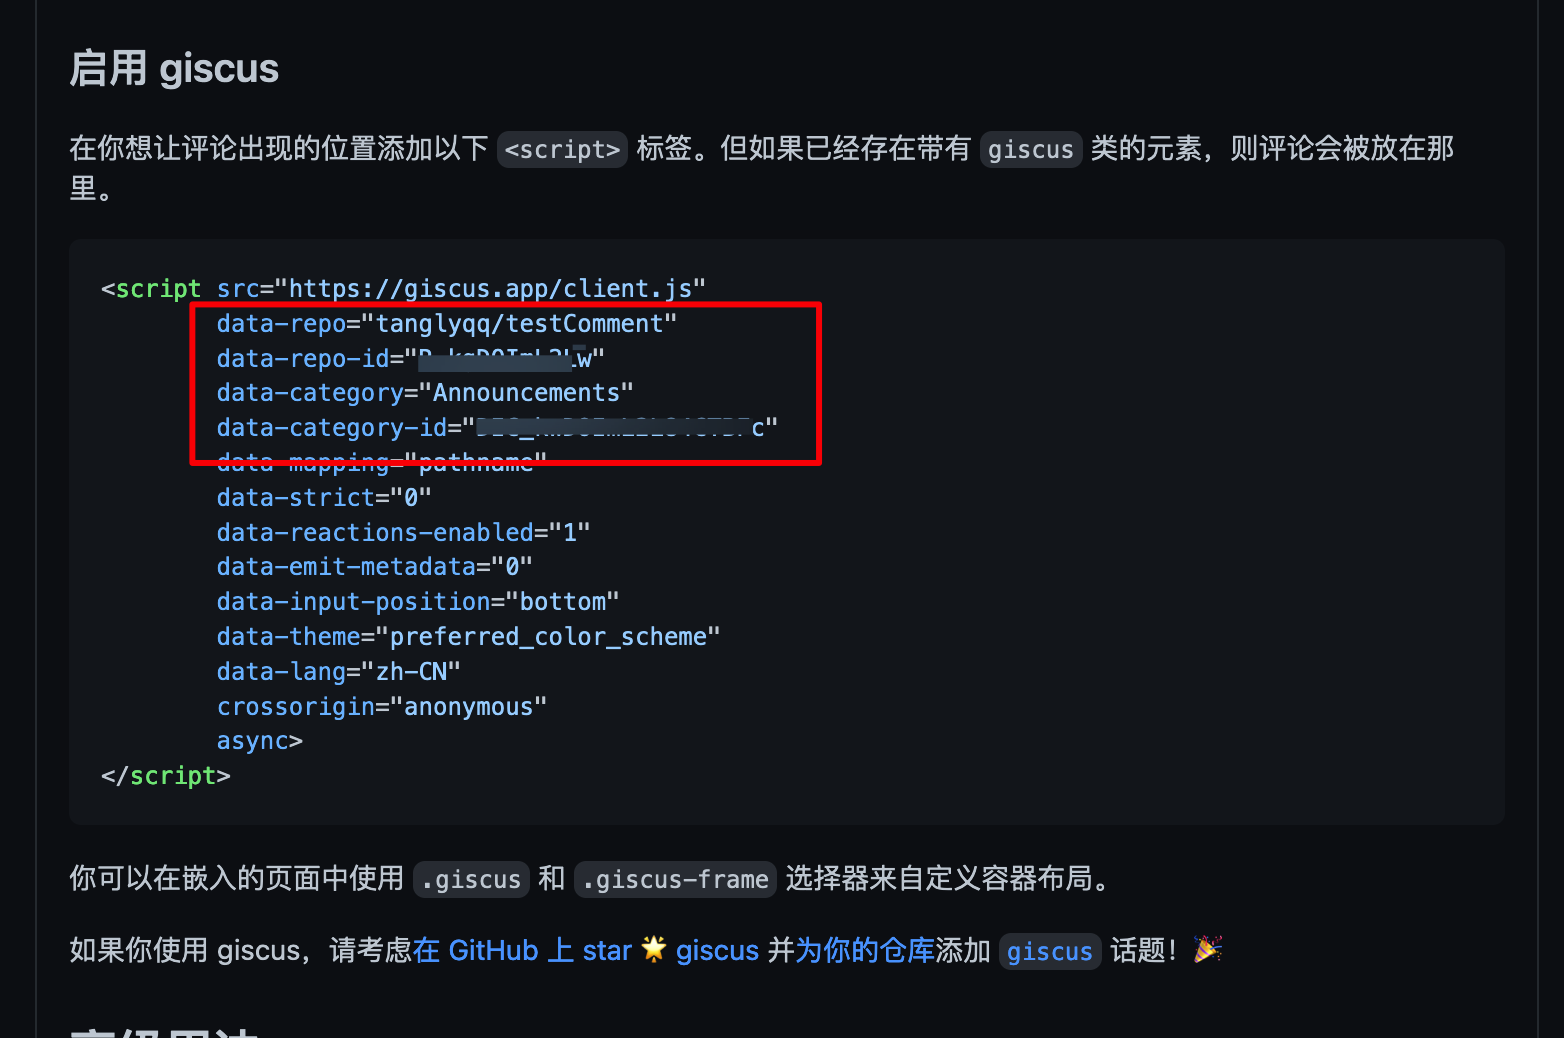
配置NotionNext
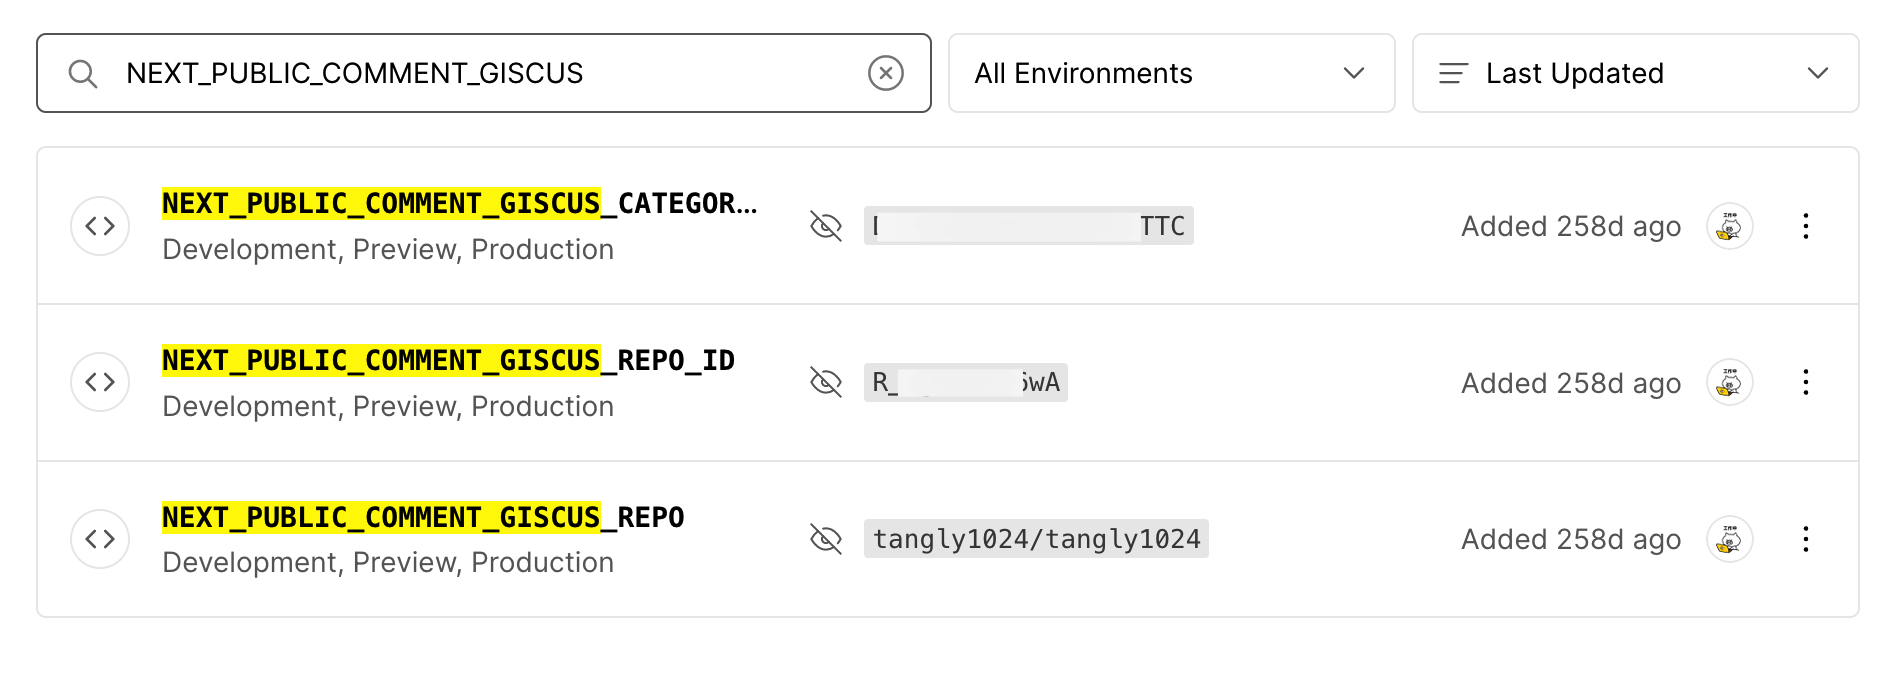
在Vercel后台将上面获取的Giscus配置参数添加到环境变量。
giscus的三项配置参数:
data-repo,data-repo-iddata-category-id 添加到Vercel后台环境变量的名字关系:giscus参数名 | vercel变量名 |
data-repo | NEXT_PUBLIC_COMMENT_GISCUS_REPO |
data-repo-id | NEXT_PUBLIC_COMMENT_GISCUS_REPO_ID |
data-category-id | NEXT_PUBLIC_COMMENT_GISCUS_CATEGORY_ID |
添加效果如下
添加完环境变量记得Redploy项目。

Loading...


