前言
参考haixin的文章《NotionNext建站-cloudflare版》,这里做了优化
部署效果预览

CloudFlare版本是静态导出的,不支持实时更新文章,每次需要手动部署。
开始
访问CloudFlarePage


创建项目
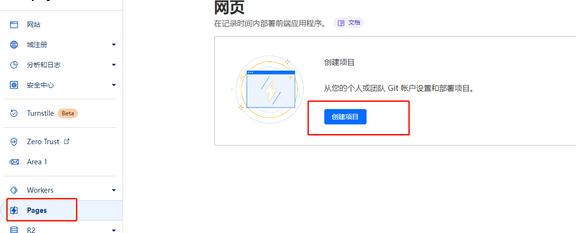
- 直接连接git

- 导入项目

3.选择分支(作废)

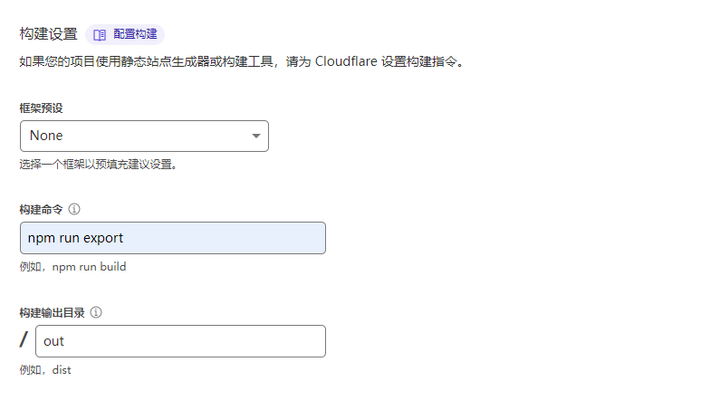
环境变量
配置效果如下

配置说明
变量名称 | 值 |
NODE_VERSION | 16 |
VERCEL_ENV | production |
NOTION_PAGE_ID | {您的Notion页面id} |
最后点击保存并部署即可。
完成部署
页面中心会显示您的访问域名

绑定域名
项目主页找到
自定义域,找到下方设置自定义域
填写域名并继续

按照要求在域名服务商后台配置一个CNAME转发

- CNAME转发示例

- 点击下方的激活域,由于我使用的域名商本身就是cloudflare,故此步骤只需几秒即可完成验证。

Loading...


