
前言
你是否想搭建一个属于自己的独立博客,碍于不懂得如何建站和网页开发?或者你不希望耗费精力处理网页设计、SEO优化、数据库设计维护等麻烦事。
试试这套成熟的解决方案,可以快速帮助你搭建一个属于自己的独立网站,免去大量开发维护的麻烦。几分钟就能把你的笔记本软件变成一个网站~
工具说明
Nextjs-Notion-Starter-Kit : 这是作者自己开发、用于支撑个人博客/文件网站的开源项目。它使用 Notion 作为 CMS,从 Notion 获取内容数据,然后使用Next.js和react-notion-x来静态渲染所有内容。然后将该站点部署到Vercel。
特点
- 界面风格
- 首页是一个Notion的页面,完全在你的笔记中设计板面
- 使用reaction-notion-x库渲染Notion笔记的元素样式,与Notion软件中的样式基本一致,你也可以进行自定义
- 支持侧边Table Contents文章目录
- 支持Collection、Database等复杂Block的展示
- 支持手动日间、夜间模式
- 支持调用NotionAPI搜索文章
- 默认使用 https://utteranc.es/ Github评论插件
- 支持Fathom 统计,类似GoogleAnalystics
不足之处:
- 文章url不能自定义,默认读取notion的笔记标题,只支持英文,中文会被忽略
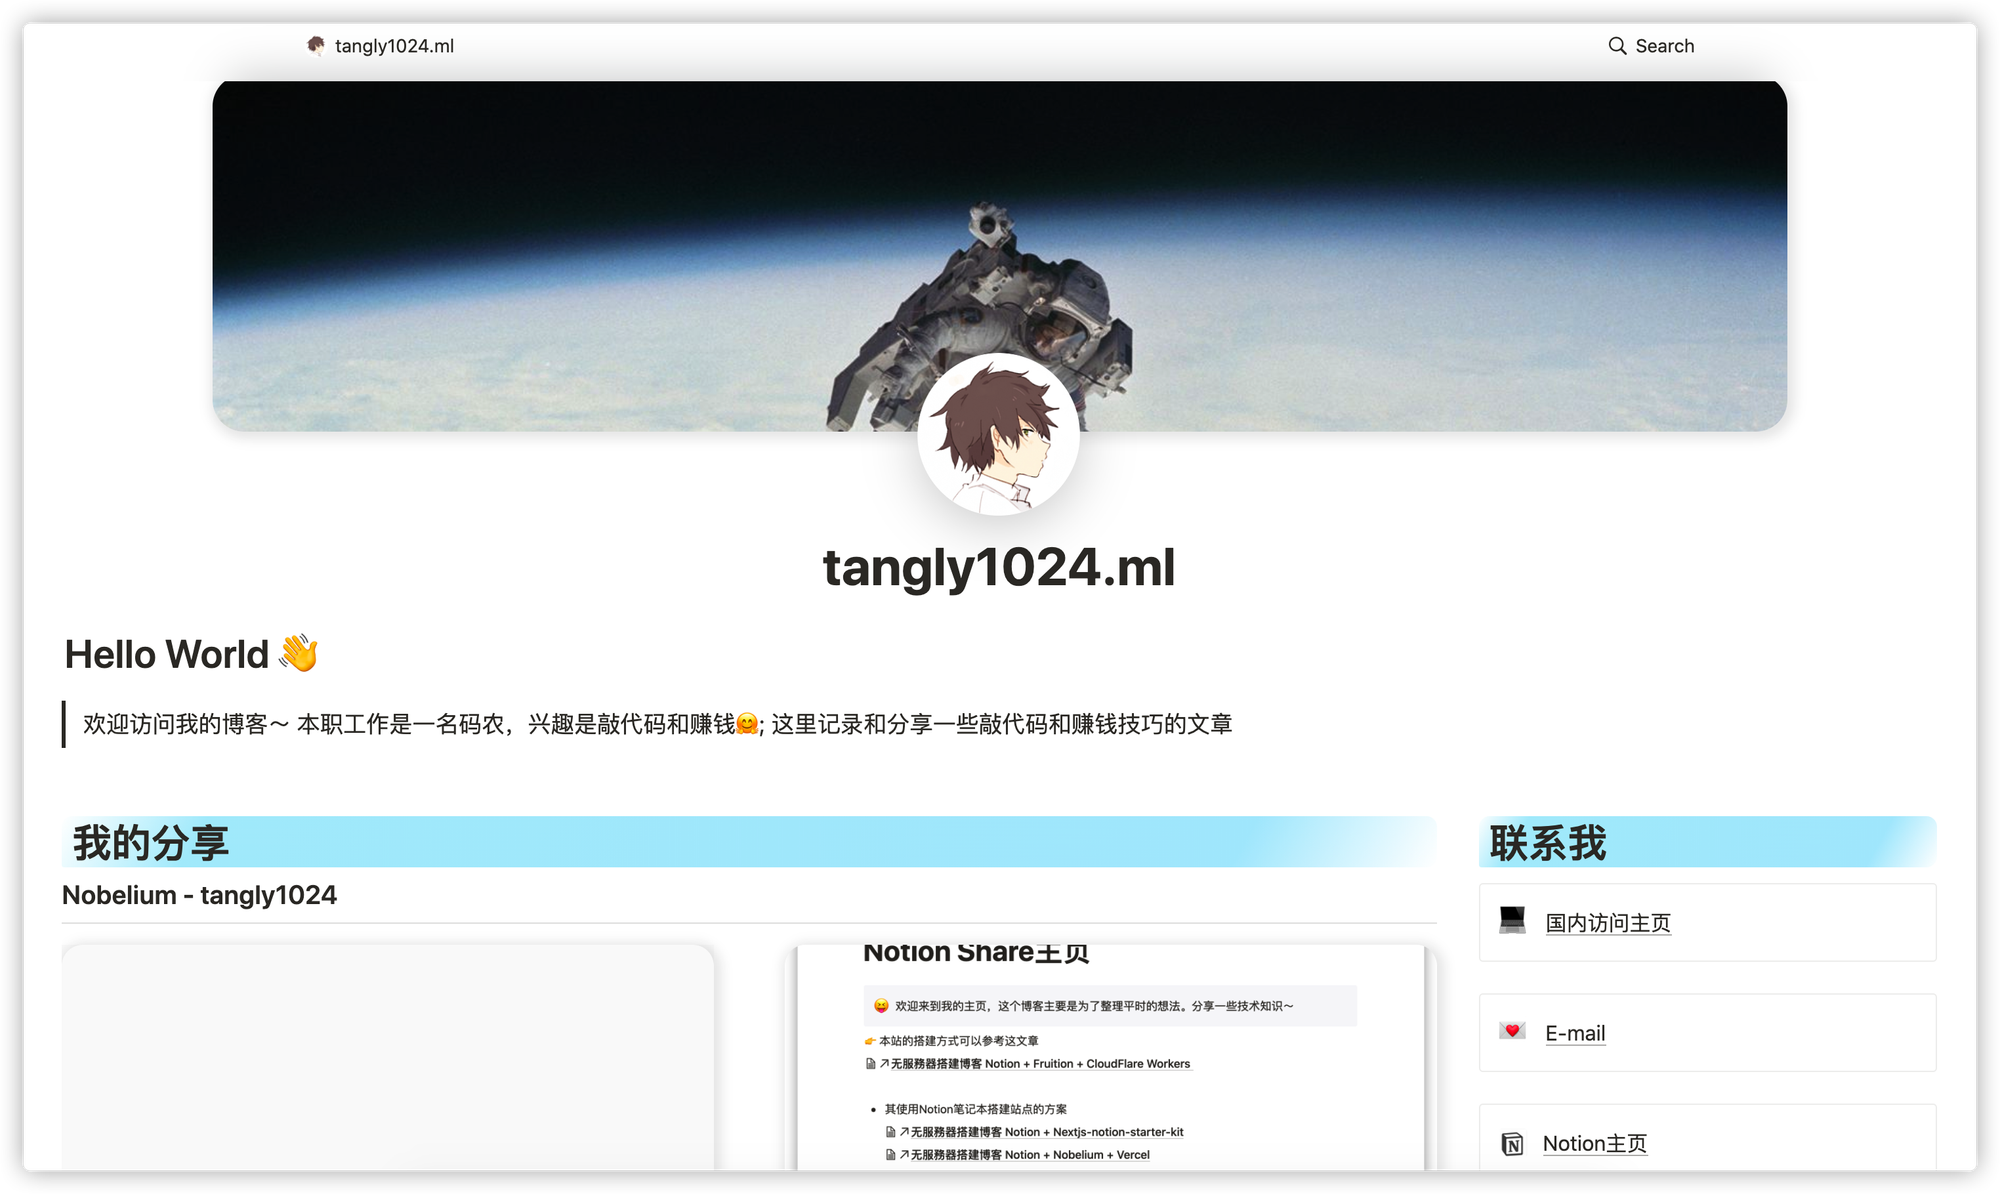
演示地址
这篇文章将介绍如何用Nextjs-Notion-Starter-Kit 这套方案搭建一个独立博客网站
快速搭建
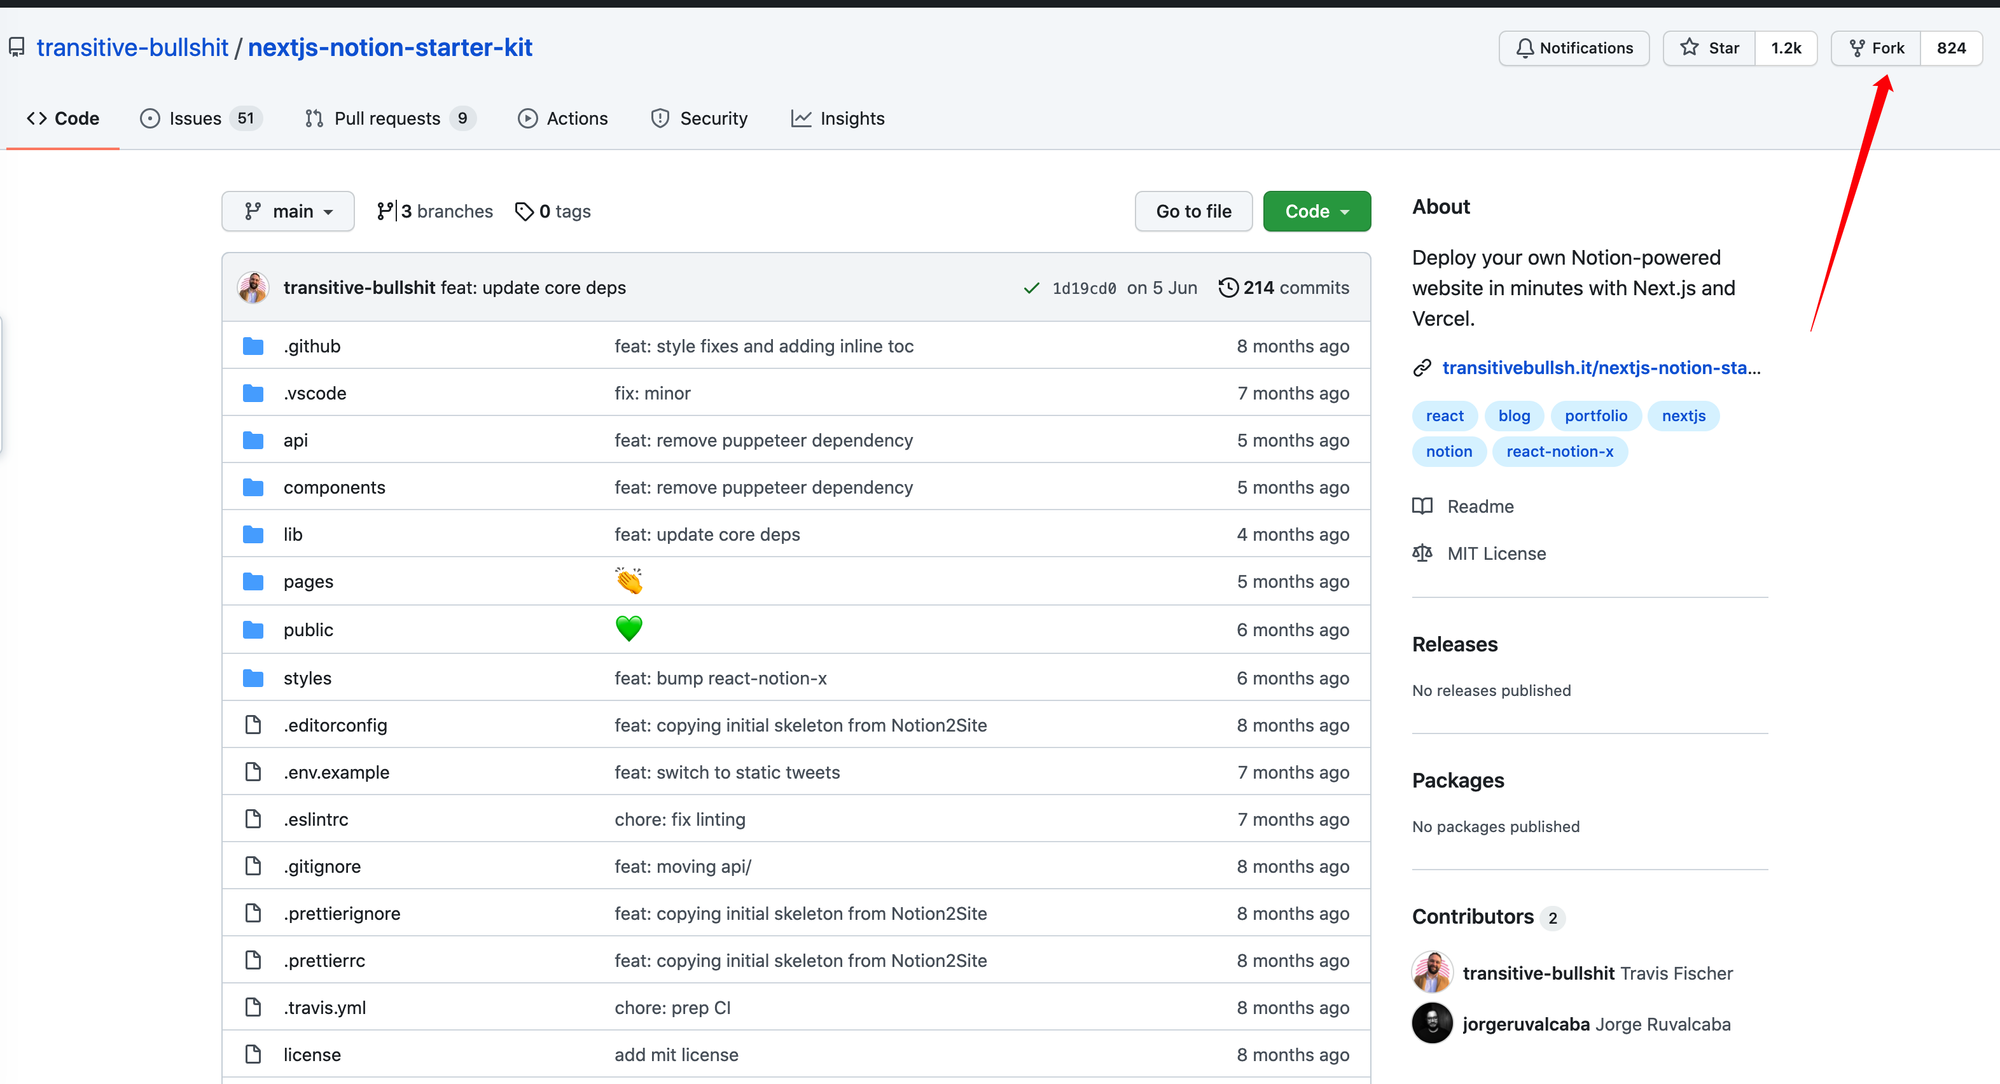
熟悉开源github项目的话,可以直接移步官方README文档,步骤说明已经十分想尽! Nextjs-Notion-Starter-Kit
1. 复制项目
2.修改配置
编辑 site.config.js
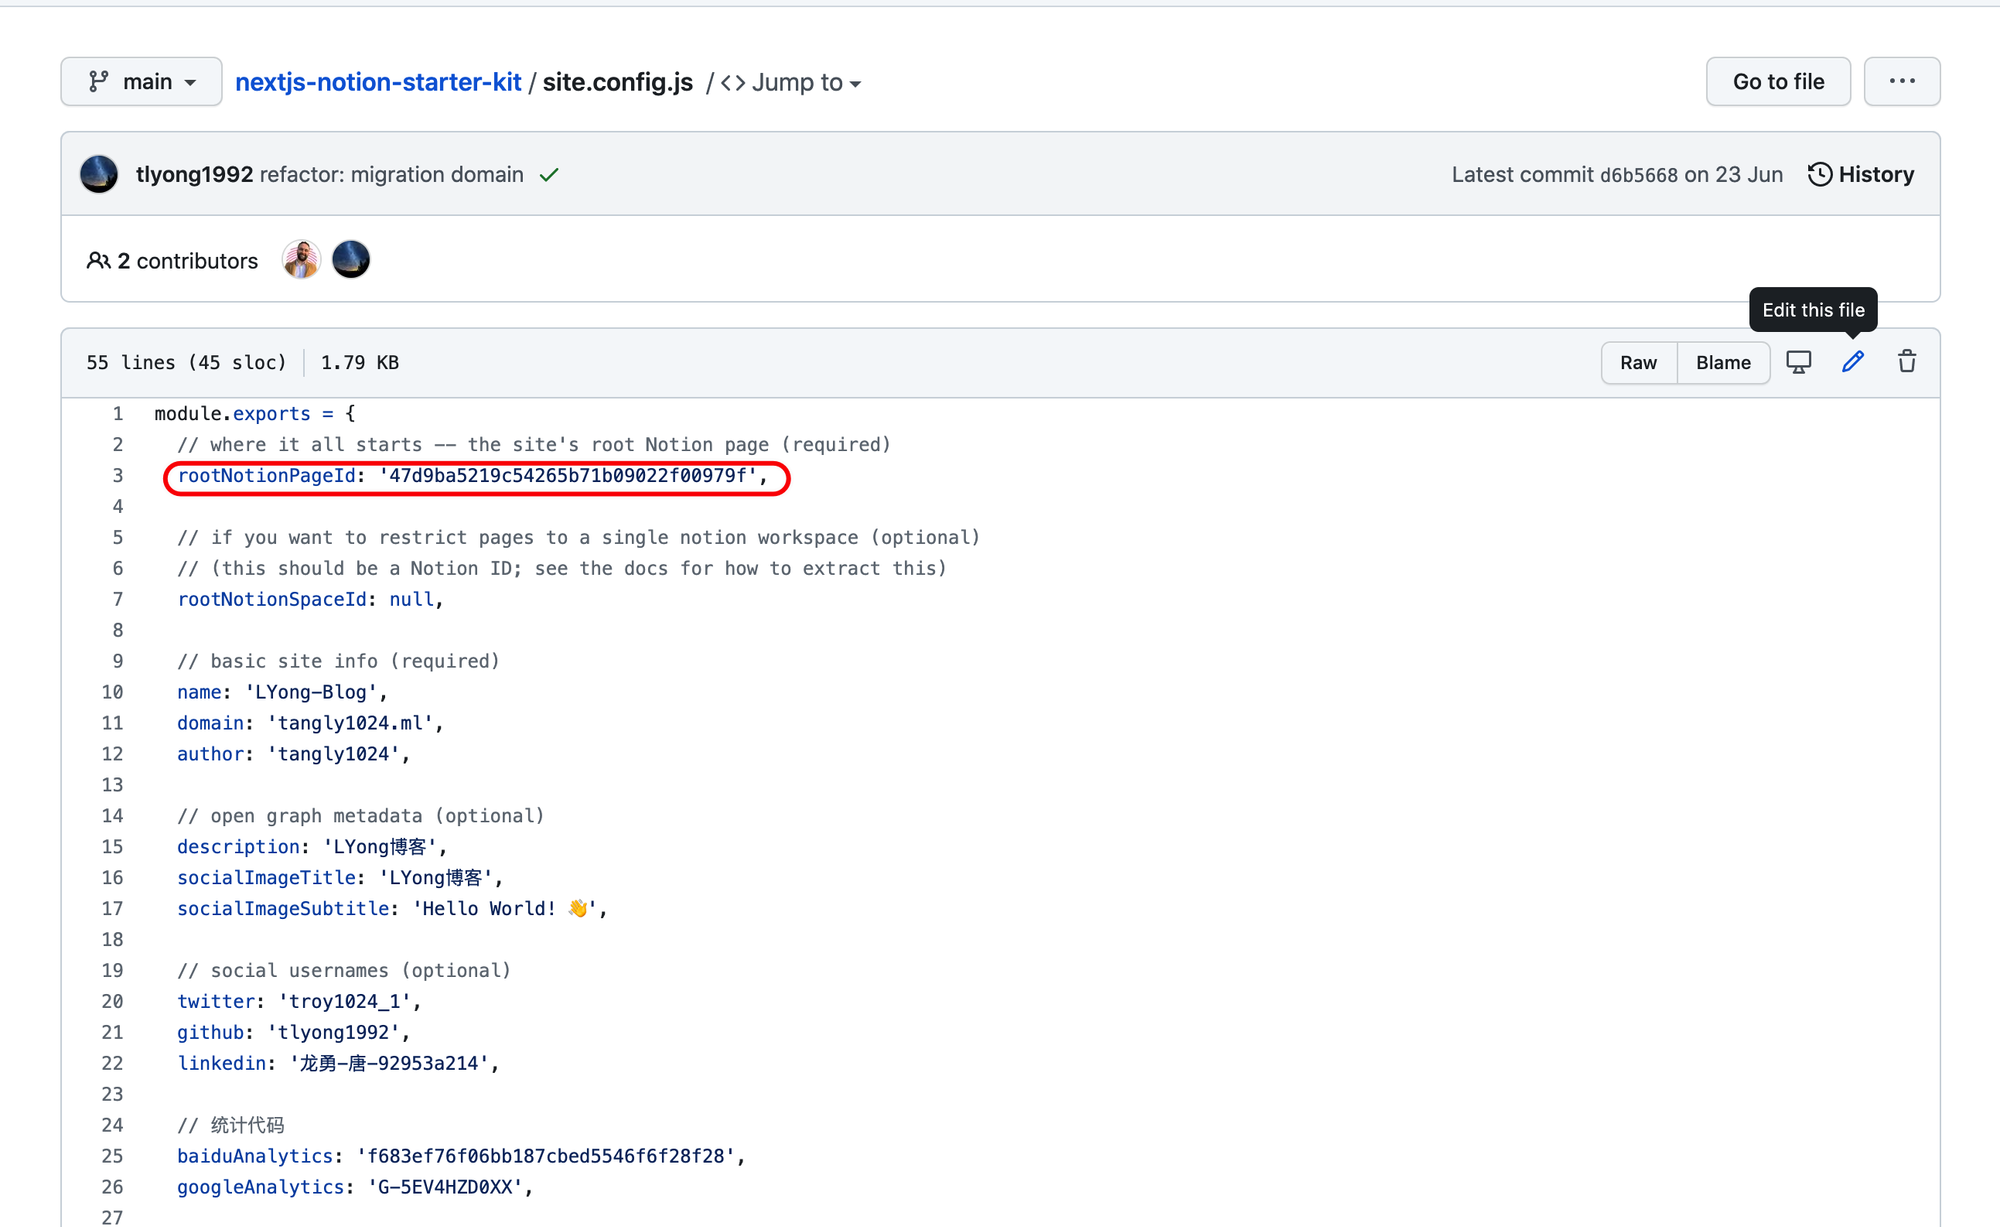
配置说明
唯一必要做的就是编辑
rootNotionPageId。这个值用来指定要呈现在网站上的首个页面;- 您需要先公开Share您的Notion 页面,然后将链接复制到剪贴板。然后提取看起来像 的 URL 的最后一部分
d1b5dcf8b9ff425b8aef5ce6f0730202,这是您页面的 Notion iD。
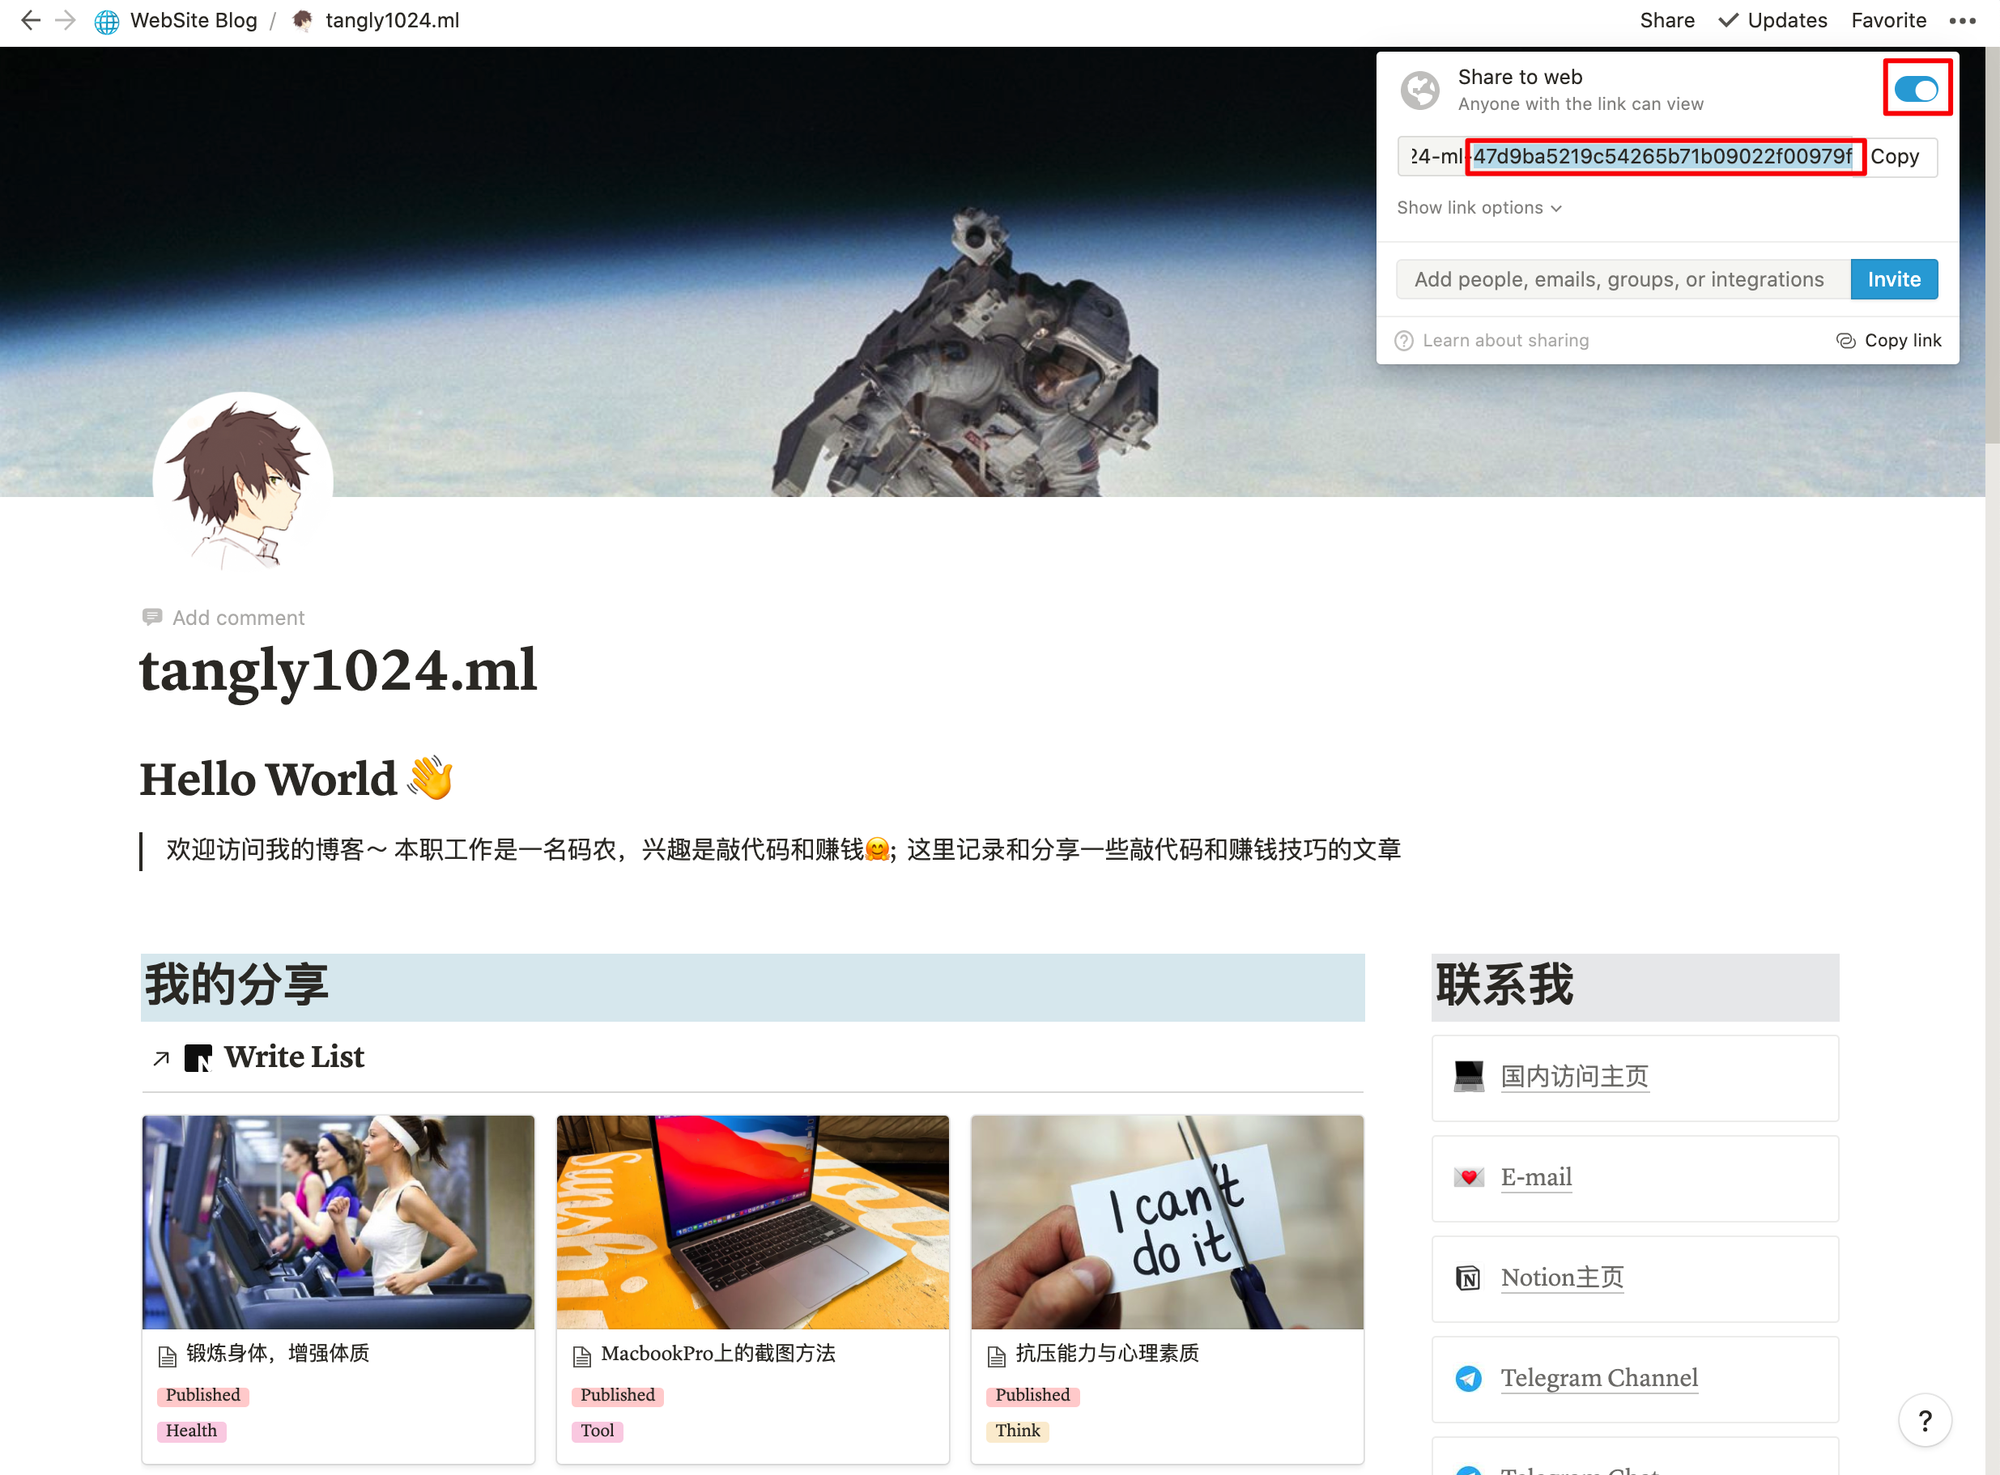
- 建议是在首页上设置一个集合(可选),其中包含您的所有文章/项目/内容。然而,你的 Notion 工作区没有任何结构限制,因此可以像通常在 Notion 中一样随意添加内容。
部署
注册并登录Vercel后台(建议是用Github登录),点击部署新项目【New Project】

点击从github仓库导入项目:

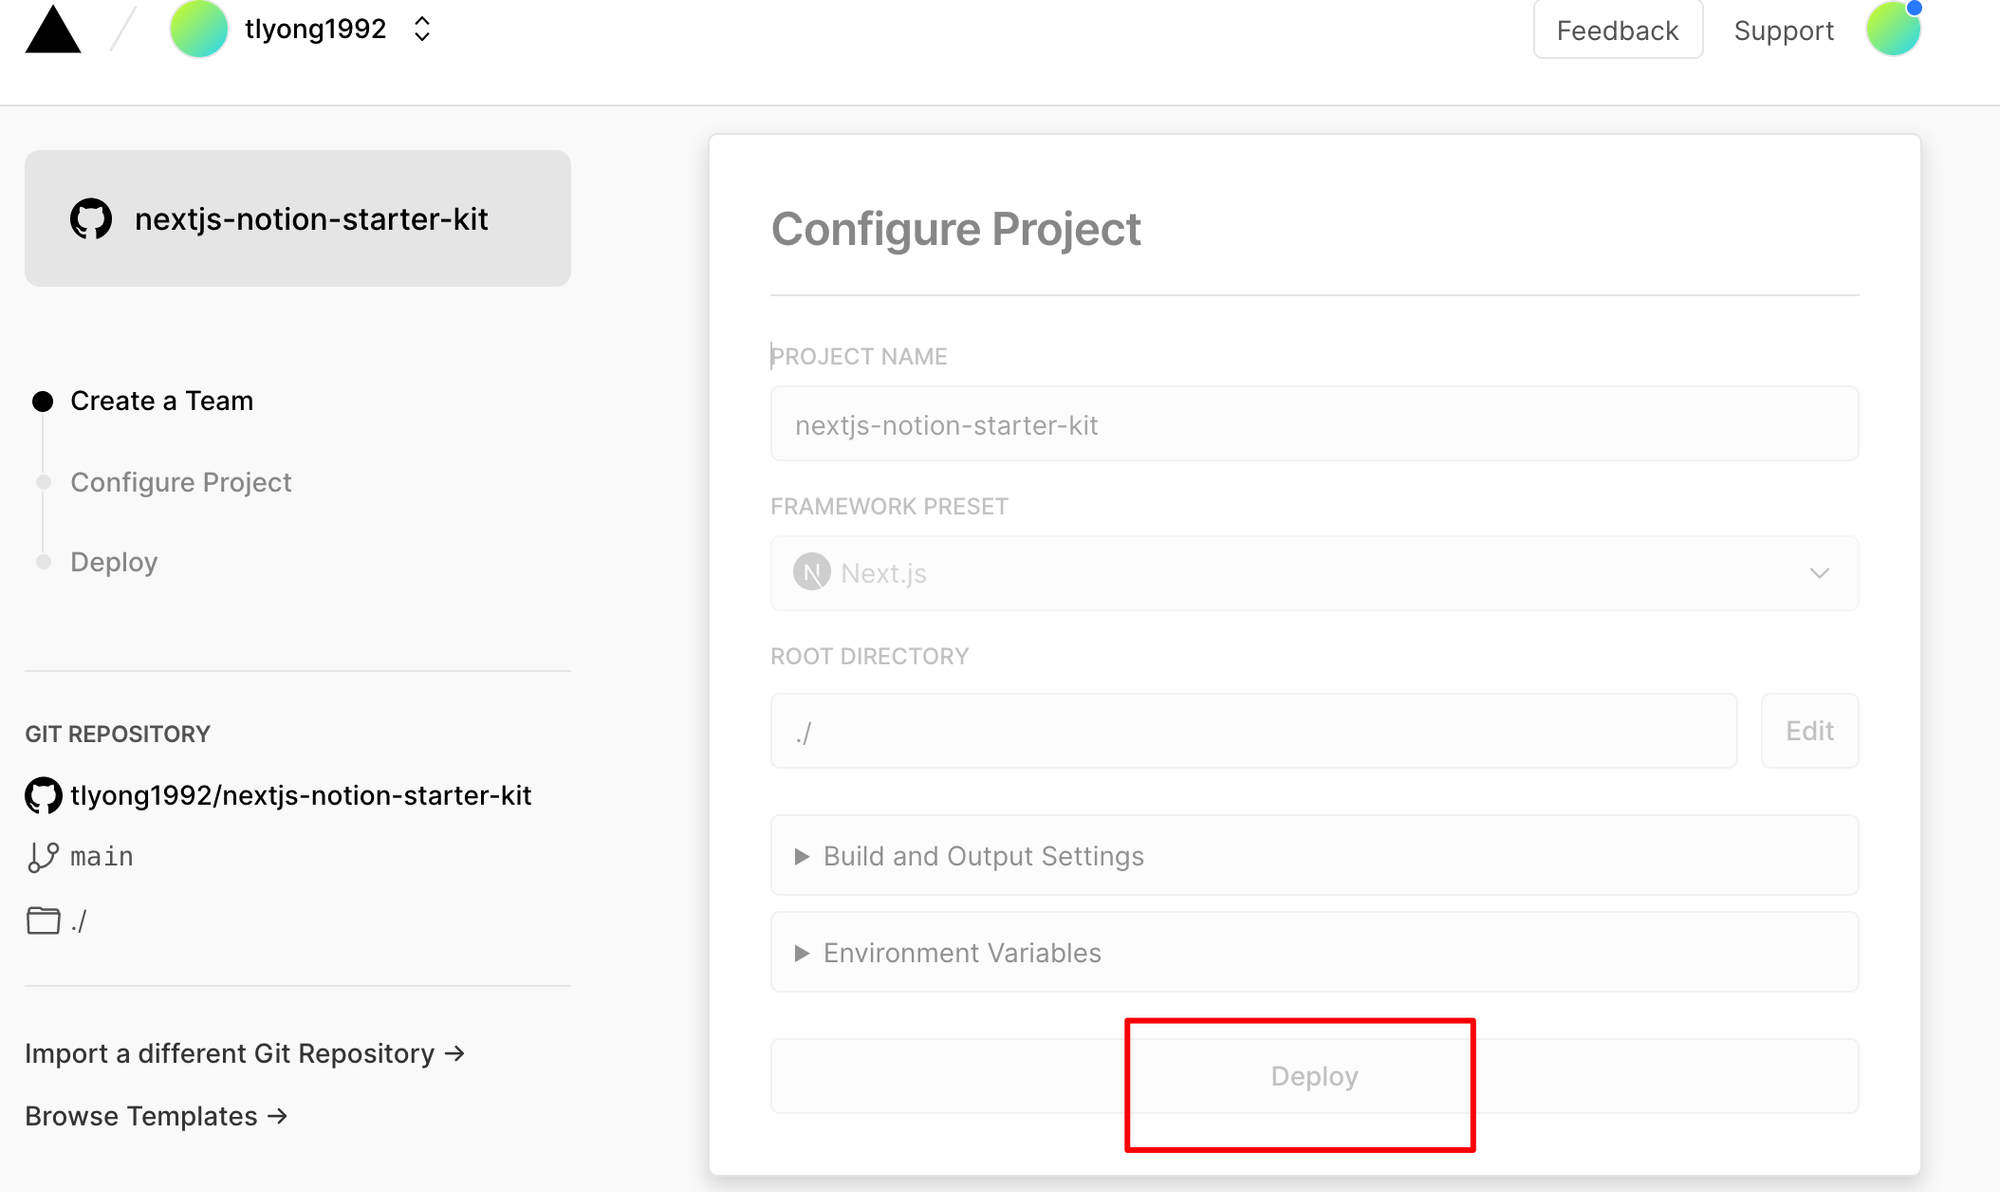
在项目配置中找到deploy,直接点击部署
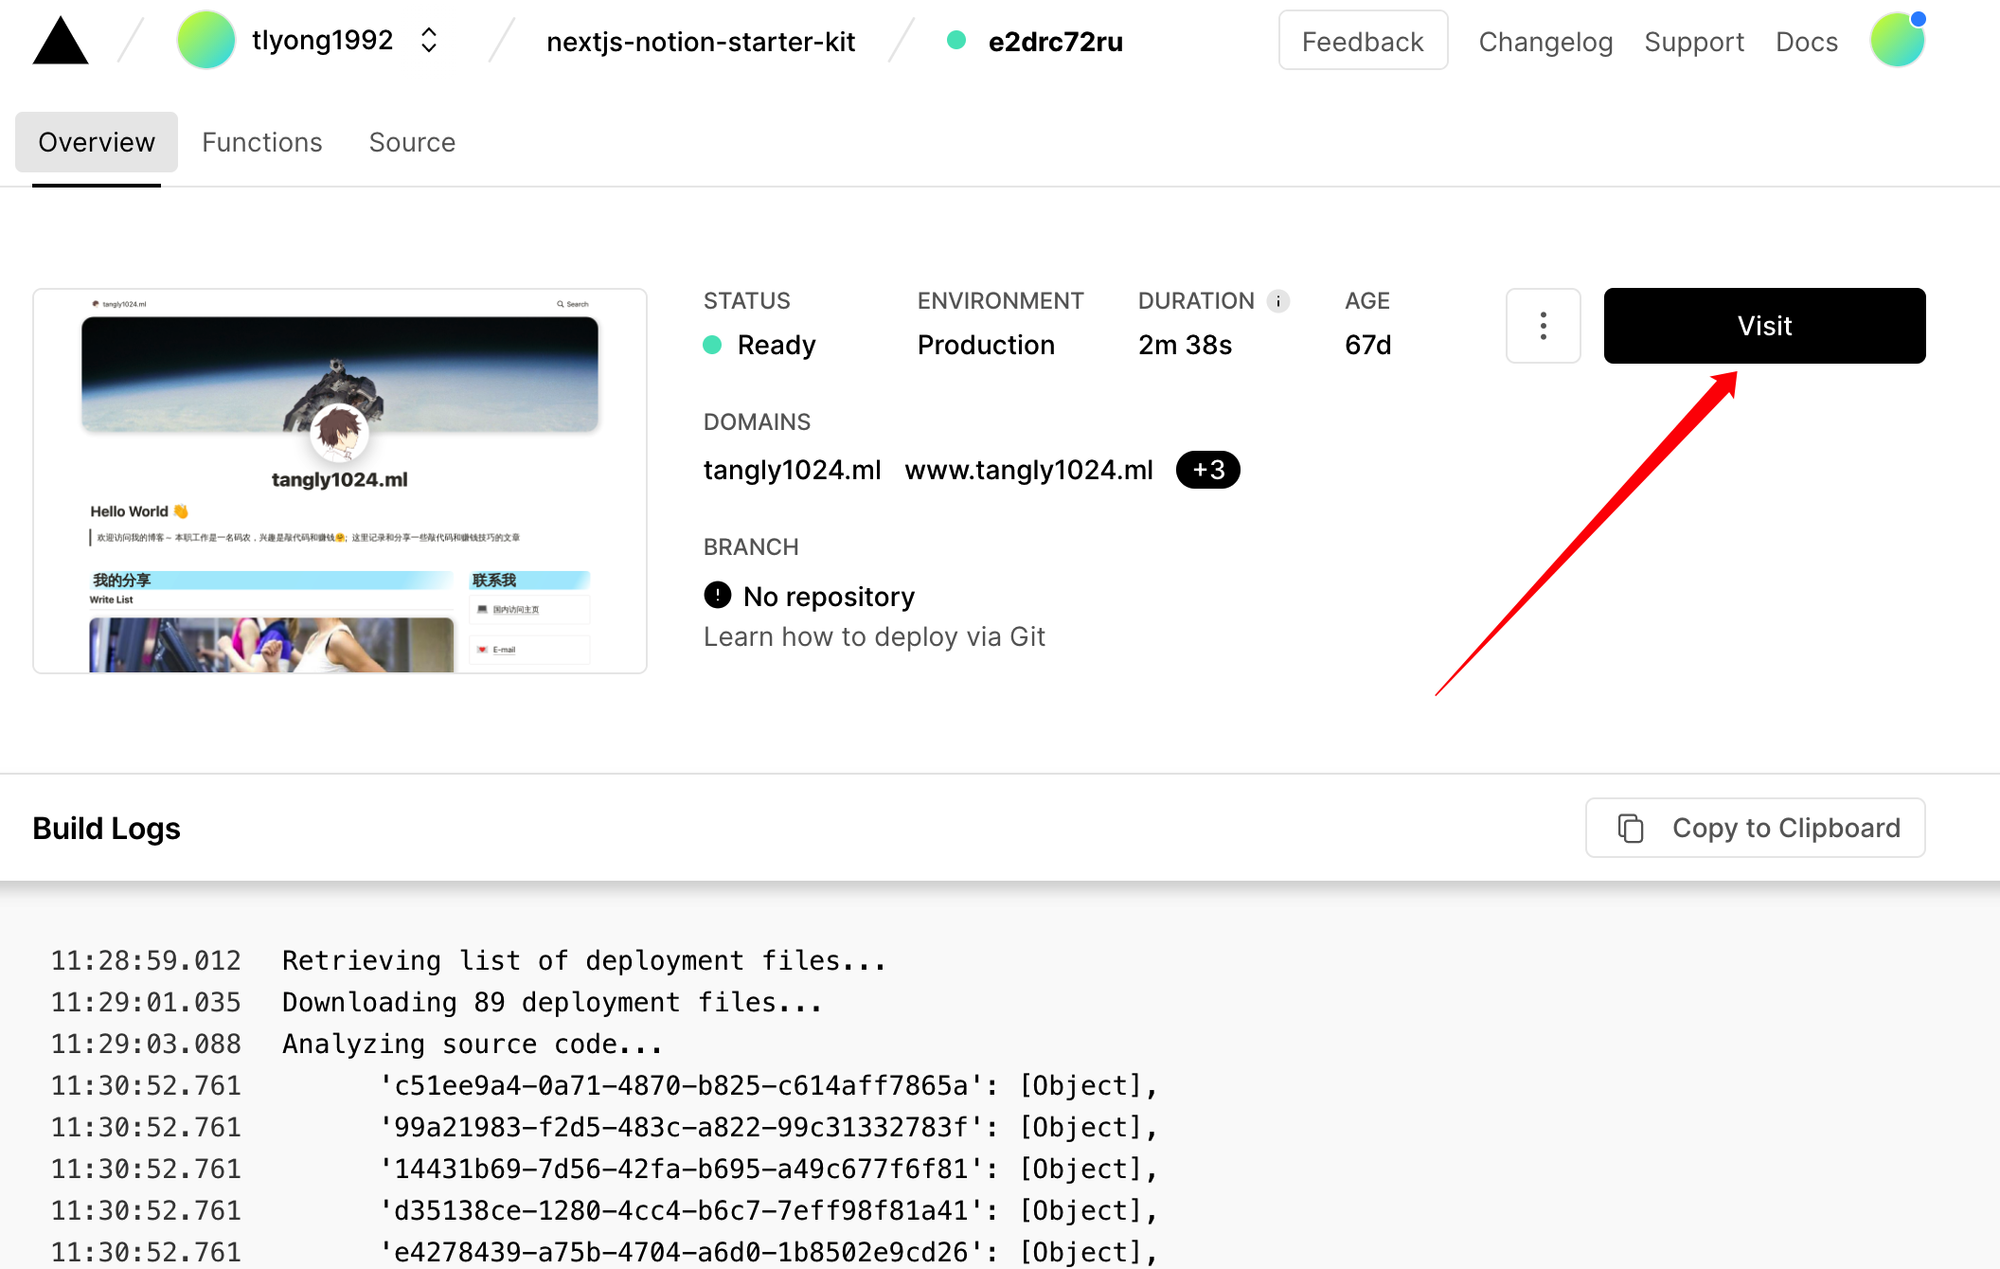
部署完成后,点击Visit按钮访问你的站点。
域名映射
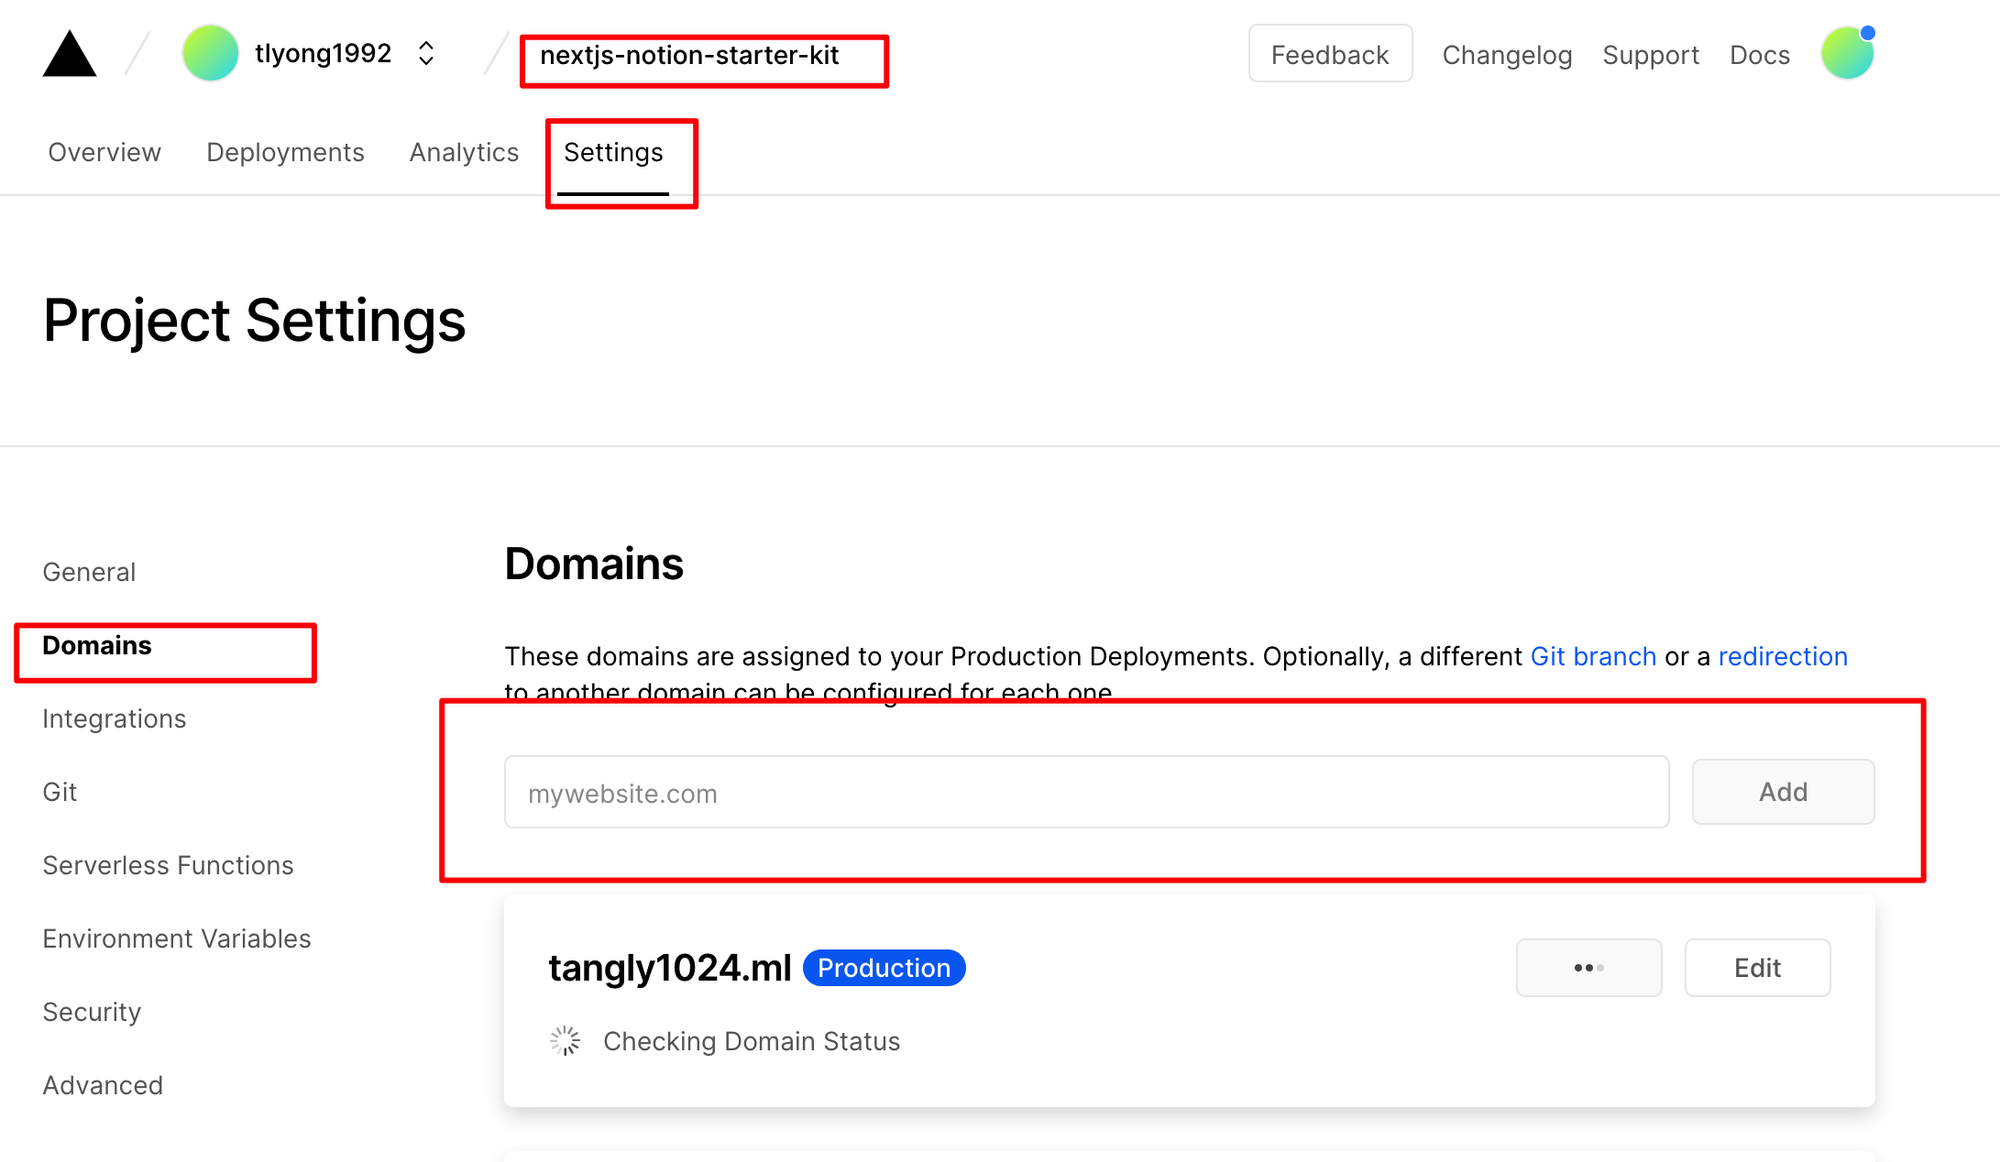
1.在项目面板中找到 Settings→Domains ; 输入你的域名,并点击Add。
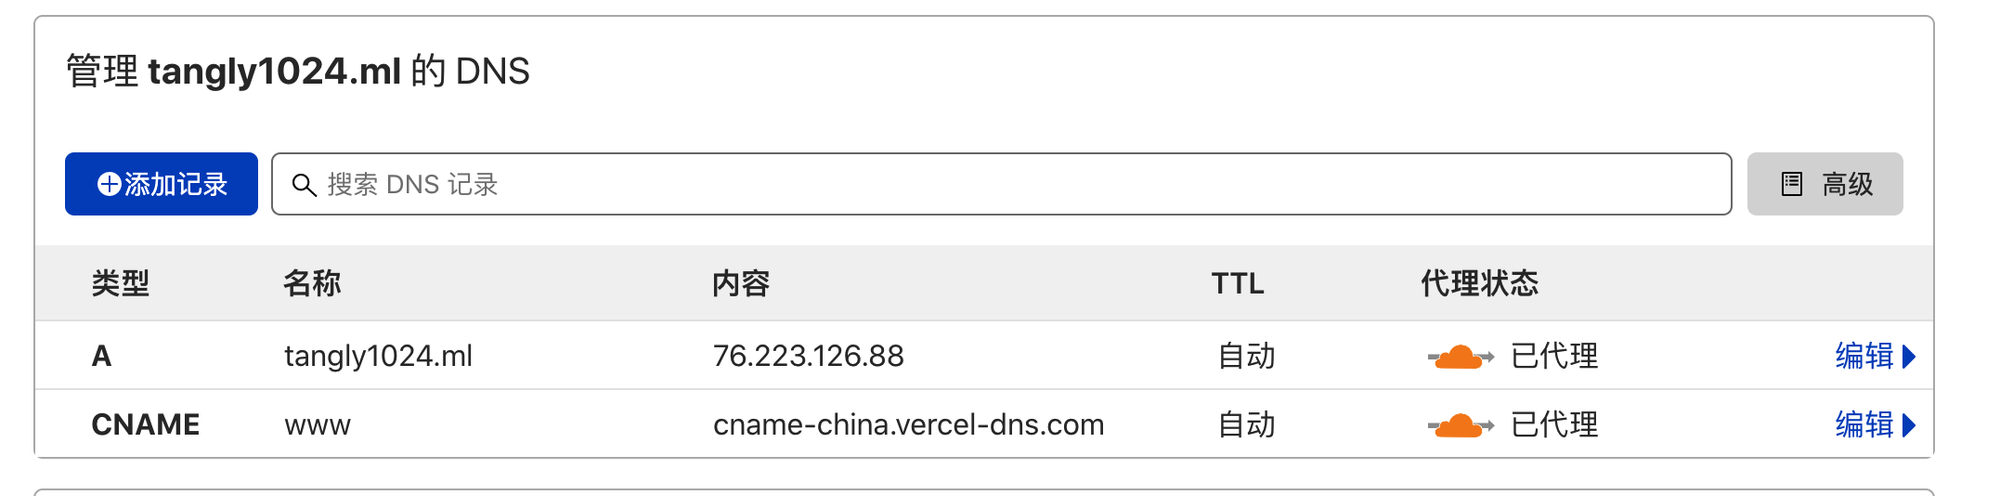
2.根据提示,在域名服务商后台配置Verccel的Cname,这里我距离用CloudFlare的域名解析服务;
添加一个A类型,名称是你的域名,指向Vercel服务器 76.223.126.88
添加一个CNAME类型,名称为www,指向 cname-china.vercel-dns.com
总结
至此,你可以通过自己的域名打开你的Notion网站了。关于Notion搭建博客的另一个方案Nobelium可以参考这篇文章:
![Vercel + Notion搭建独立博客[Nobelium]](https://www.notion.so/image/https%3A%2F%2Fwww.tangly1024.com%2Ffavicon.ico?table=block&id=74d83b59-006c-4451-8861-05f977408a38&t=74d83b59-006c-4451-8861-05f977408a38)
![Vercel + Notion搭建独立博客[Nobelium]](https://www.notion.so/image/https%3A%2F%2Fog-image-craigary.vercel.app%2FVercel%2520%252B%2520Notion%25E6%2590%25AD%25E5%25BB%25BA%25E7%258B%25AC%25E7%25AB%258B%25E5%258D%259A%25E5%25AE%25A2%255BNobelium%255D.png%3Ftheme%3Ddark%26md%3D1%26fontSize%3D125px%26images%3Dhttps%253A%252F%252Fnobelium.vercel.app%252Flogo-for-dark-bg.svg?table=block&id=74d83b59-006c-4451-8861-05f977408a38&t=74d83b59-006c-4451-8861-05f977408a38)
行动建议
你的notion博客网站搭建成功了吗,不妨在评论区,留下你的博客地址,让我看看吧~
Loading...


